Custom Activity
Custom Activity - the activity with custom edit form and custom visual display on canvas.
Creating custom activity
For creating a custom Activity, a class inherited from ActivityBase should be created. In the Parameters field of
ActivityBase, two parameters, Name and State are stored; those are the name of the Activity and its state.
You can add variables of your own in the constructor. The variables are similar to the parameters in IDesignerParameterFormatProvider.
Parameters.Add(new CodeActionParameterDefinition()
    {
        Name = "Comment",
        Type = ParameterType.TextArea
    }
);
On entering this Activity, the Workflow Engine calls the ExecutionAsync method (PreExecutionAsync
for PreExecution mode).
Example of a class:
using OptimaJet.Workflow.Core;
using OptimaJet.Workflow.Core.Model;
using OptimaJet.Workflow.Core.Runtime;

public class MyCustomActivity: ActivityBase
{
    public MyCustomActivity() : base()
    {
        Type = "MyCustomActivity";
        Title = "My Custom Activity";
        Description = "The action is mine";

        // the file name with your form template, without extension
        Template = "MyFormTemplate";
        // the file name with your svg template, without extension
        SVGTemplate = "MySVGTemplate";

        Parameters.Add(new CodeActionParameterDefinition()
            {
                Name = "MyField",
                Type = ParameterType.TextArea
            }
        );
    }

    public override async Task ExecutionAsync(WorkflowRuntime runtime,
        ProcessInstance processInstance, Dictionary<string, string> parameters,
        CancellationToken token)
    {
        Console.WriteLine("MyCustomActivity:");
        foreach(var item in parameters)
            Console.WriteLine($"{item.Key} - {item.Value}");
        Console.WriteLine("--------------");
    }

    public override async Task PreExecutionAsync(WorkflowRuntime runtime,
        ProcessInstance processInstance, Dictionary<string, string> parameters,
        CancellationToken token)
    {

    }
}
Settings
You can modify the default settings by overriding them. These settings affect the behavior of the activity in the designer. Below is a list of settings you can use:
- AllowCycleTransition: By default, allows the creation of cyclic transitions. If disabled, you won't be able to create a transition from an activity back to itself.
- IsOutgoingTransitionsReadonly: If set to
true, the outgoing transitions of this activity are read-only and can only be edited through the activity form. Default isfalse. - BaseTemplate: Represents the base template which is used to edit the activity.
- Activity: Ordinary Activity template or template copied from it.
- JsonForm: JSON form template or template copied from it. This form will render
Parametersas form.
- SaveToAnnotationsPolicy: Defines the policy for saving parameters in the designer form.
- SaveAllExceptOrdinary: Saves all parameters in annotations except those listed in
OrdinaryActivityParameters. - DontSave: Parameters will not be saved in annotations.
- SaveSpecified: Only the parameters listed in
AnnotationActivityParameterswill be saved in annotations.
- SaveAllExceptOrdinary: Saves all parameters in annotations except those listed in
- OrdinaryActivityParameters: A list of settings that will be saved in the activity properties instead of annotations.
- AnnotationActivityParameters: A list of parameters that will be saved in annotations if the
SaveSpecifiedpolicy is enabled inSaveToAnnotationsPolicy.
Custom form
If you don't want to create a custom form for an activity, just don't populate the Template and SVGTemplate fields in your custom
activity. Just comment out the fields:
    // the file name with your form template, without extension
    //Template = "MyFormTemplate";
    // the file name with your svg template, without extension
    //SVGTemplate = "MySVGTemplate";
To change the Activity form, you should create a new file with the .html extension in the templates folder, and specify
its name in the Template field.
As an example, you can copy activity.html from the Designer. Don't forget to rename the initialization function (see the explanation below).
An activity template is a Vue.js application. Each template has two parts:
- HTML.
- JavaScript.
Each template must contain an initialization function named
templateName_Init, for example, for a template activity it will be activity_Init, for a template decision it will
be decision_Init. This function will be called after the template is loaded. The initialization function takes one parameter me,
which is an instance of the activity window.
Do not use the - character in the template name, as well as other characters that cannot be used in the JavaScript function name.
Instead, use camelCase for the template name.
You should also add me.VueConfig.methods.onUpdate method that accepts one item parameter - activity data. In this method, you can
initialize the form data.
<h3>Your form name</h3>
<el-form>
    <!-- Your Vue.js form -->
</el-form>
<script type="application/javascript">
    function customActivity_Init(me) {
        // implementation

        me.VueConfig.methods.onUpdate = function (item) {
            // implementation
        }
    }
</script>
Custom canvas element
To change the Activity image in the canvas, you should create a new file with the .svg extension in
the templates/elements folder, and specify its name in the SVGTemplate field.
As an example, you can copy activity.svg from the Designer.
Registration
For registration, the WithCustomActivities method of the WorkflowRuntime should be executed:
_runtime.WithCustomActivities(new List<ActivityBase>() {new MyCustomActivity()});
Or you can register only one custom activity:
_runtime.WithCustomActivity(new MyCustomActivity());
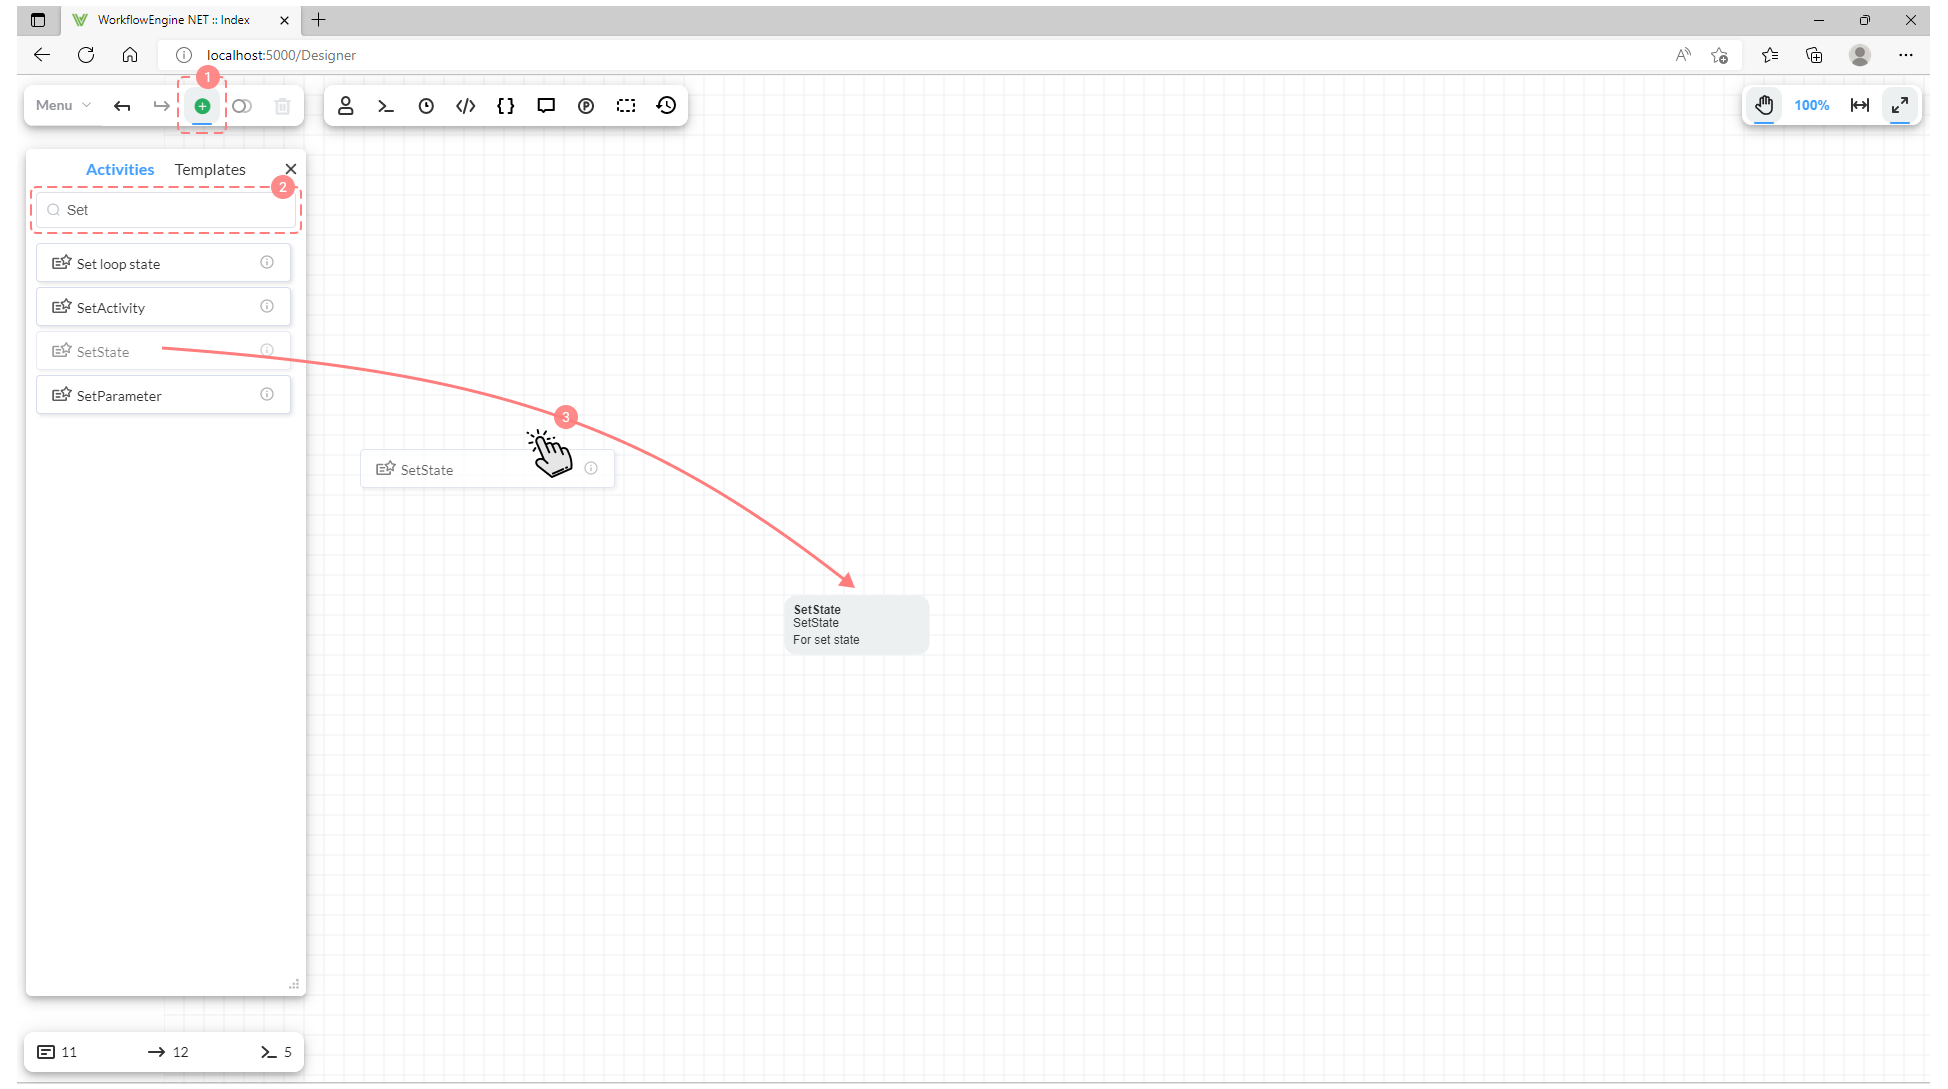
All custom Activities will be displayed in the Elements panel:

To add your custom activity to the scheme, proceed as follows:
- Open the Elements panel.
- Find the activity in the list of elements or use Search.
- Drag the element to the canvas.
Existing templates
You can find an existing templates for activities in our GitHub repository as well as custom canvas elements.