React sample in Docker
Tutorial 2 📦
main - initial branch
dockerizing - final branch
dockerizing pull request - pull request with code changes
Overview
In this second tutorial we describe the code improvements and the steps to follow in order to deploy the React sample application in Docker.

Prerequisites
We recommend reading Docker documentation to get a base understanding of Docker's concepts and principles.
- First, you should go through previous tutorials OR clone main branch.
- JetBrains Rider or Visual Studio.
- Command prompt or Terminal.
In addition, you must download and install the latest version of Docker Desktop.
Backend
The required changes in the backend are illustrated in this section. New files must be added, and some files must be modified to run React sample in Docker.
DatabaseUpgrade
First, the backend should bring up the script for the database. This can be done by creating the class DatabaseUpgrade in the project
folder WorkflowApi. This class reads the SQL script from this directory, and it attempts to execute the script in the database. If the
execution process presents an exception, the operation will be repeated, a delay is done, and again the procedure for running the script is
executed. This is required because the database in the Docker container might start up after the backend application, and during this short
time it may be not available, so the exception allows to execute the start script several times to raise the database while it is not
successful.
using Microsoft.Data.SqlClient;

namespace WorkflowApi;

public class DatabaseUpgrade
{
    private const int AttemptCount = 100;
    private static readonly TimeSpan Delay = TimeSpan.FromSeconds(5);

    private readonly string _connectionString;
    private readonly string _sqlScript;

    private DatabaseUpgrade(string connectionString, string sqlScript)
    {
        _connectionString = connectionString;
        _sqlScript = sqlScript;
    }

    public static async Task WaitForUpgrade(string connectionString)
    {
        var sql = await File.ReadAllTextAsync("./Sql/CreatePersistenceObjects.sql");
        var instance = new DatabaseUpgrade(connectionString, sql);
        await instance.Upgrade();
        await Console.Out.WriteLineAsync("The database has been upgraded");
    }

    private async Task Upgrade(int attemptNumber = 0)
    {
        try
        {
            await Console.Out.WriteLineAsync($"Upgrading database, attempt number: {attemptNumber}");
            await UpgradeDatabase();
        }
        catch (Exception e)
        {
            await Console.Error.WriteLineAsync(e.Message);
            if (attemptNumber >= AttemptCount) throw;

            await Task.Delay(Delay);
            await Upgrade(attemptNumber + 1);
        }
    }

    private async Task UpgradeDatabase()
    {
        await using var connection = new SqlConnection(_connectionString);
        await connection.OpenAsync();
        await using var command = connection.CreateCommand();
        command.CommandText = _sqlScript;
        await command.ExecuteNonQueryAsync();
    }
}
WorkflowApiConfiguration
The WorkflowApiConfiguration was included to define the backend configuration. The Cors and LicenseKey will be set in the docker compose
file, so these settings are indicated in the configuration.
namespace WorkflowApi;

public class WorkflowApiConfiguration
{
    public WorkflowApiCorsConfiguration Cors { get; set; }

    public string LicenseKey { get; set; }
}

public class WorkflowApiCorsConfiguration
{
    public List<string> Origins { get; set; }
}
CreatePersistenceObjects
Next, in the Backend a directory called Sql and the SQL script CreatePersistenceObjects.sql must be added also in WorkflowApi
project to create the database objects according the Workflow Engine standard.
You can download the MS SQL database script here.
Then, set it in the location: Backend/WorkflowApi/Sql/CreatePersistenceObjects.sql.
Starting from Workflow Engine version 13.0.0, automatic migrations are now available, and scripts are no longer supported. For more information, see the documentation.
WorkflowApi
Furthermore, the WorkflowApi.csproj must be modified. The script should be published during assembling in the directory with binary and
executed files.
<Project Sdk="Microsoft.NET.Sdk.Web">

  <ItemGroup>
    <ProjectReference Include="..\WorkflowLib\WorkflowLib.csproj" />
  </ItemGroup>

  <ItemGroup>
    <PackageReference Include="WorkflowEngine.NETCore-Core" Version="7.1.3" />
    <PackageReference Include="WorkflowEngine.NETCore-ProviderForMSSQL" Version="7.1.3" />
  </ItemGroup>

  <ItemGroup>
    <None Update="Sql\CreatePersistenceObjects.sql">
      <CopyToOutputDirectory>Always</CopyToOutputDirectory>
    </None>
  </ItemGroup>

  <PropertyGroup>
    <TargetFramework>net7.0</TargetFramework>
    <Nullable>enable</Nullable>
    <ImplicitUsings>enable</ImplicitUsings>
  </PropertyGroup>

</Project>
Program
The Program.cs was also modified. When starting the program, the configuration is set through the configuration file and the script to
raise the database is executed. Here, we get apiConfiguration, the Cors settings are changed from AllowAnyOrigin to withOrigins which
is taken from the configuration file, the connectionString is gotten by GetConnectionString, the DatabaseUpgrade is launched, and then
the connectionString is provided for WorkflowInit. Besides, the LicenseKey is passed to WorkflowRuntime object.
The Cors address will be set from appsettings.json and the script will be run for starting the database. These changes allow to rise the
database along with backend and frontend when starting Docker.
using OptimaJet.Workflow.Core.Runtime;
using WorkflowApi;

var builder = WebApplication.CreateBuilder(args);

// Add services to the container.
builder.Services.AddControllersWithViews();

const string rule = "MyCorsRule";
builder.Services.Configure<WorkflowApiConfiguration>(builder.Configuration);
var apiConfiguration = builder.Configuration.Get<WorkflowApiConfiguration>();
if (apiConfiguration?.Cors.Origins.Count > 0)
{
    builder.Services.AddCors(options =>
    {
        options.AddPolicy(rule, policy =>
        {
            policy.WithOrigins(apiConfiguration.Cors.Origins.ToArray());
        });
    });
}

var app = builder.Build();

var connectionString = app.Configuration.GetConnectionString("Default");
if (connectionString is null)
{
    throw new NullReferenceException("Default connection string is not set");
}
await DatabaseUpgrade.WaitForUpgrade(connectionString);

WorkflowLib.WorkflowInit.ConnectionString = connectionString;

if (!string.IsNullOrEmpty(apiConfiguration?.LicenseKey))
{
    WorkflowRuntime.RegisterLicense(apiConfiguration.LicenseKey);
}

...
App settings
In the configuration file appsettings.json, we register the Cors, the LicenseKey and the localhost address for the frontend, and also
the ConnectionStrings
options are set.
  "LicenseKey": "",
  "Cors": {
    "Origins" : ["http://localhost:3000"]
  },
  "ConnectionStrings": {
    "Default": "Data Source=(local);Initial Catalog=master;User ID=sa;Password=StrongPassword#1"
  }
WorkflowInit
In addition, the ConnectionString must be replaced with property in WorkflowInit.cs because it is set in the configuration file.
public static class WorkflowInit
{
    private const string ConnectionString = "Data Source=(local);Initial Catalog=master;User ID=sa;Password=StrongPassword#1";

    private static readonly Lazy<WorkflowRuntime> LazyRuntime = new(InitWorkflowRuntime);
    private static readonly Lazy<MSSQLProvider> LazyProvider = new(InitMssqlProvider);

    public static string ConnectionString { get; set; } = "";
    public static WorkflowRuntime Runtime => LazyRuntime.Value;
    public static MSSQLProvider Provider => LazyProvider.Value;
    ...
All of these are the required changes in the backend application.
Docker Compose
A new directory called docker-files is added in the project root directory with these three files: backend.Dockerfile,
frontend.Dockerfile and docker-compose.yml.
backend.Dockerfile
The backend.Dockerfile is added for starting the backend application. Here, the backend image is built and placed in a Docker container.
FROM mcr.microsoft.com/dotnet/sdk:7.0 AS build
WORKDIR /src
COPY Backend.sln .
COPY WorkflowApi/WorkflowApi.csproj WorkflowApi/WorkflowApi.csproj
COPY WorkflowLib/WorkflowLib.csproj WorkflowLib/WorkflowLib.csproj
RUN dotnet restore Backend.sln --source https://api.nuget.org/v3/index.json
COPY ./ .
RUN dotnet build Backend.sln --configuration Release --output /app
FROM build AS publish
WORKDIR /src/WorkflowApi
RUN dotnet publish WorkflowApi.csproj --configuration Release --output /app
FROM mcr.microsoft.com/dotnet/aspnet:7.0 AS base
WORKDIR /app/sample
COPY /app ./bin
RUN useradd --user-group --uid 1000 wfe
RUN chown -R wfe:wfe /app
USER wfe
WORKDIR /app/sample/bin
ENTRYPOINT ["dotnet", "WorkflowApi.dll"]
frontend.Dockerfile
Moreover, the frontend.Dockerfile which runs the frontend through NPM package manager.
FROM node:lts-alpine3.17

RUN mkdir /app
WORKDIR /app

COPY package*.json .
RUN npm install --legacy-peer-deps

ENTRYPOINT ["npm", "run", "start"]
docker-compose.yml
Now, we have docker-compose.yml. We created a YAML file to define the services with Docker compose. It means the list of services (or
containers) that we want to run as part of our application.
First, the frontend is defined, it runs on port 3000. The port 3000 inside the container is exposed to port 3000 outside the container.
After that, the backend is started. The environment variables must be specified. The ConnectionStrings settings, the LicenseKey and the
Cors Origins as http://localhost:3000 from the frontend. The queries from the frontend must be processed by the
backend.
Finally, the database service is also set. The Azure SQL image is used.
name: react-example-docker

services:
  frontend:
    depends_on:
      - backend
    container_name: frontend
    hostname: frontend
    build:
      context: ../frontend
      dockerfile: ../docker-files/frontend.Dockerfile
    volumes:
      - ../frontend/public:/app/public
      - ../frontend/src:/app/src
    ports:
      - 3000:3000
  backend:
    depends_on:
      - database
    container_name: backend
    hostname: backend
    build:
      context: ../Backend
      dockerfile: ../docker-files/backend.Dockerfile
    environment:
      ConnectionStrings__Default: Server=database;Initial Catalog=master;User ID=sa;Password=StrongPassword#1
      ASPNETCORE_URLS: http://+:5139
      LicenseKey:
      Cors__Origins__0: http://localhost:3000
    ports:
      - 5139:5139
  database:
    container_name: database
    hostname: database
    image: mcr.microsoft.com/azure-sql-edge:latest
    environment:
      MSSQL_SA_PASSWORD: StrongPassword#1
      ACCEPT_EULA: 1
    cap_add:
      - SYS_PTRACE
    ports:
      - 1433:1433
    volumes:
      - ./var/mssql-data:/var/opt/mssql/data
Running the application stack
Now, we can start docker-compose.yml file up!
-
Start up the application stack using the following command. You might add the -d flag to run everything in the background.
cd docker-files
docker compose up --build --force-recreate -
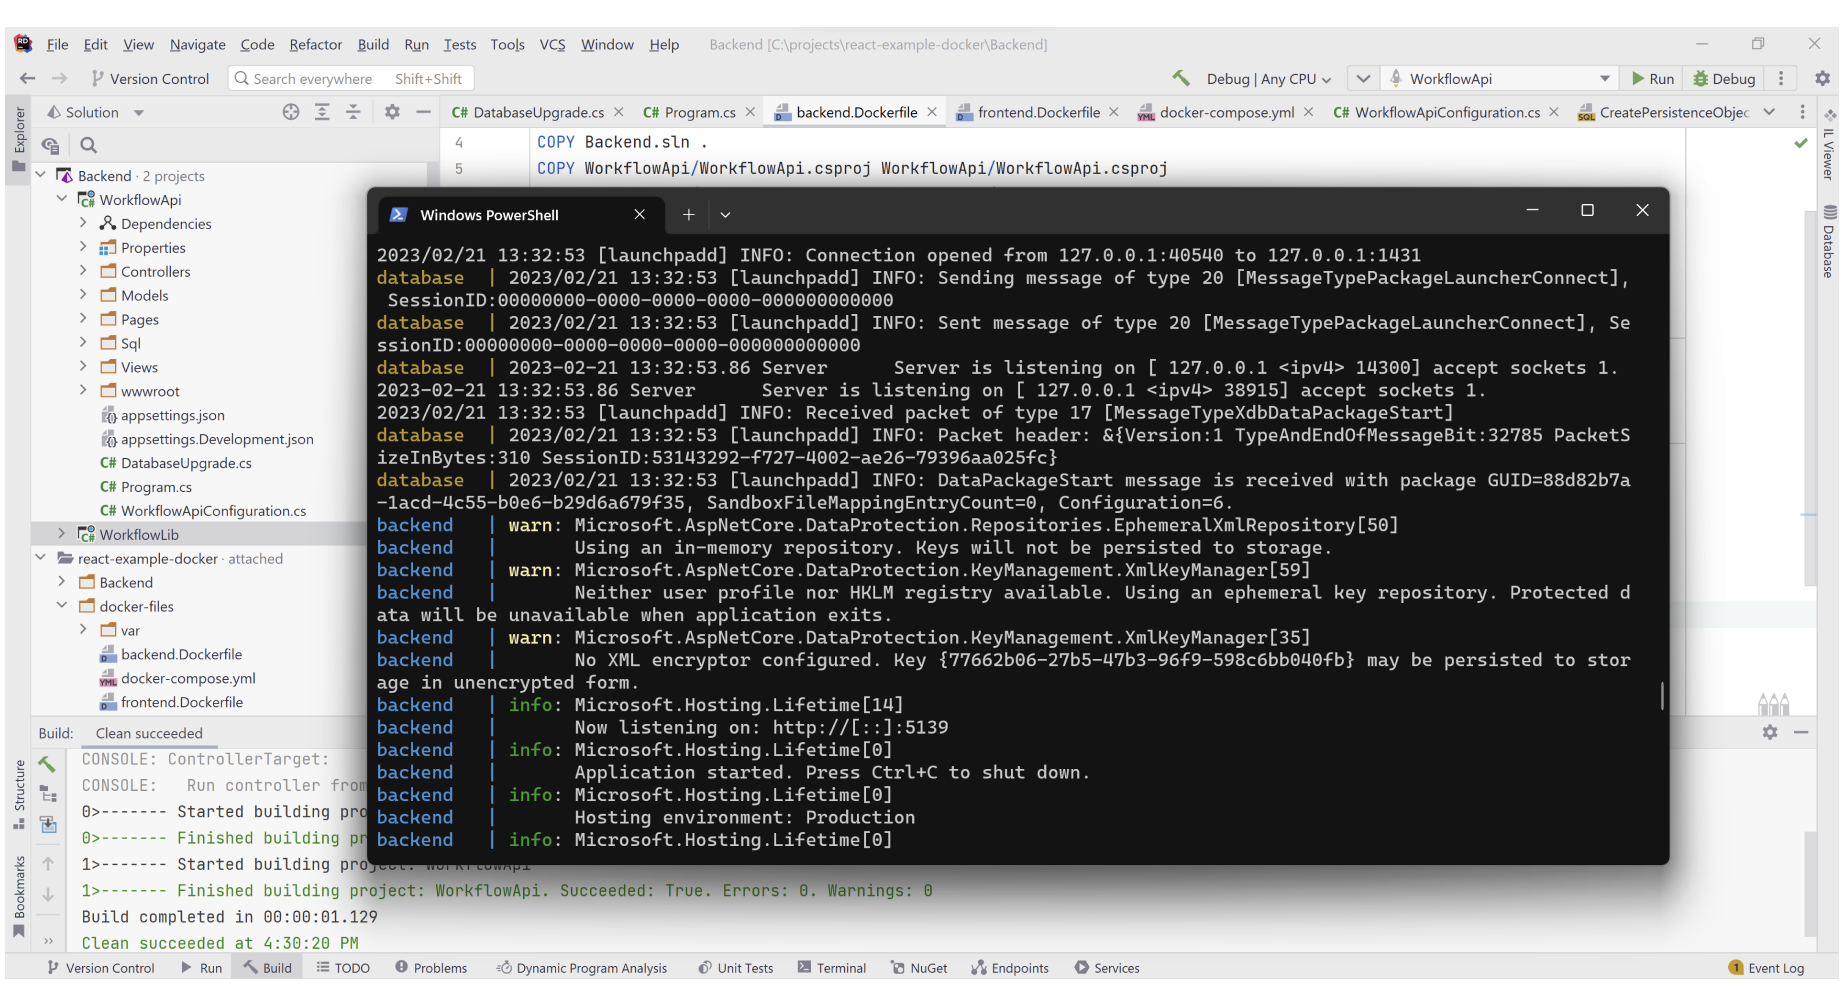
Once you run the command, you should see this output:
PS> docker compose up
[+] Running 4/4
 - Network react-example-docker_default  Created                                                                   0.9s
 - Container database                    Created                                                                   0.1s
 - Container backend                     Created                                                                   0.4s
 - Container frontend                    Created                                                                   0.1s
Attaching to backend, database, frontend
database  | Azure SQL Edge will run as non-root by default.
database  | This container is running as user mssql.
database  | To learn more visit https://go.microsoft.com/fwlink/?linkid=2140520.
database  | 2023/02/21 11:49:21 [launchpadd] INFO: Extensibility Log Header: <timestamp> <process> <sandboxId> <sessionId> <message>
-
Go to http://localhost:3000/ in your preferred browser.
-
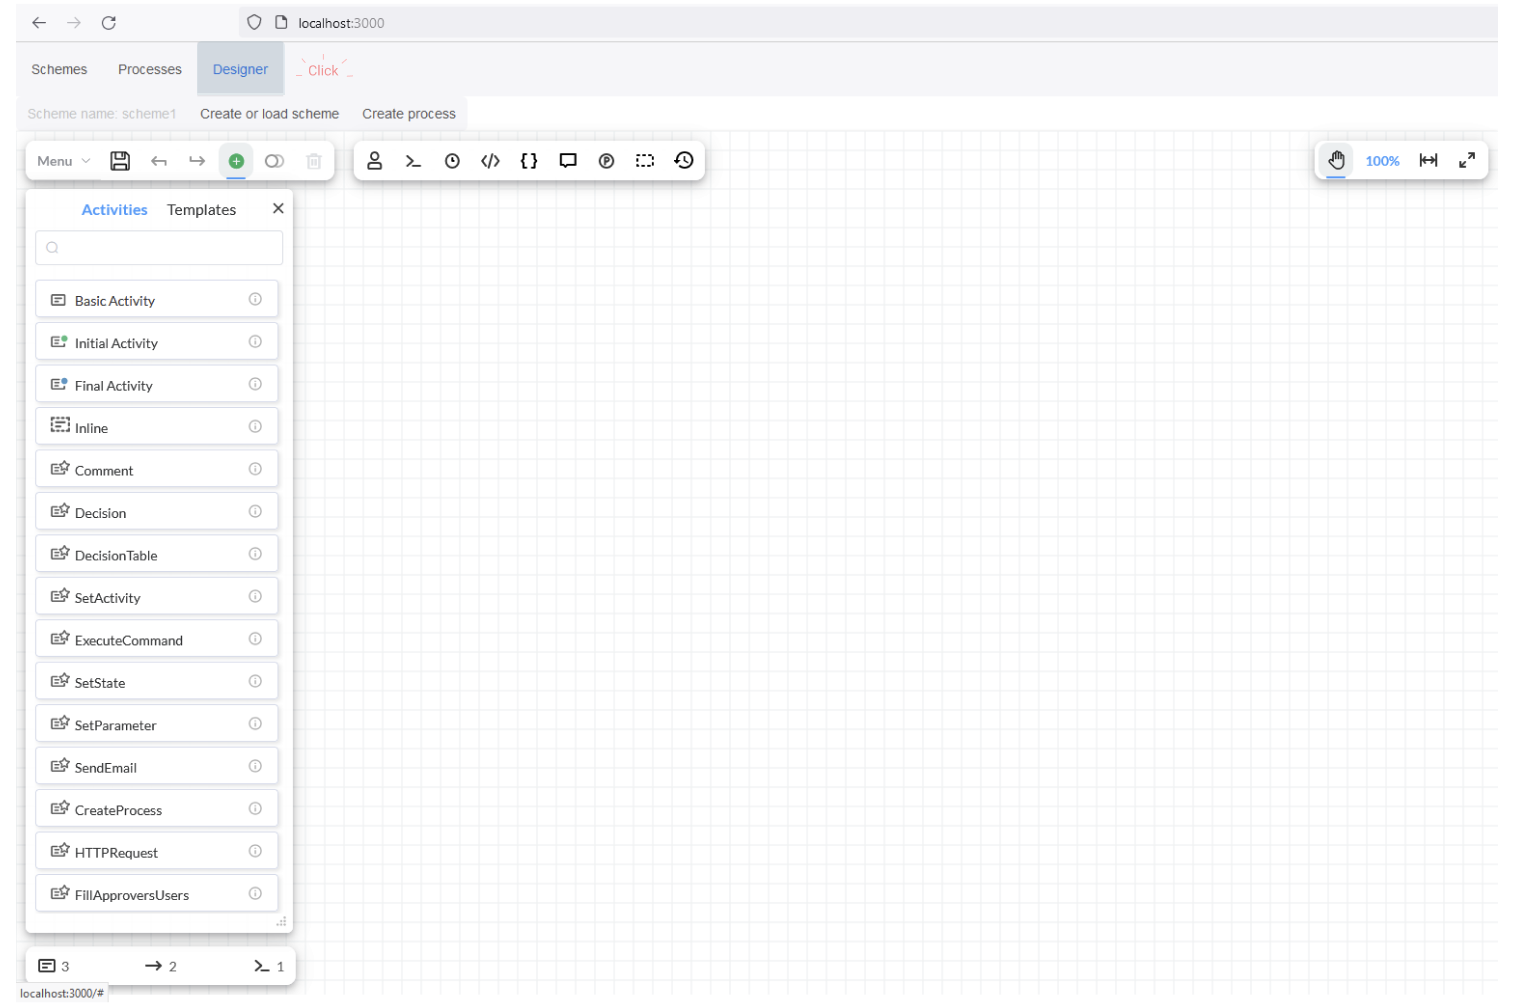
Click on tab Designer to check. If the Designer is loaded properly, it means that everything works ok!

-
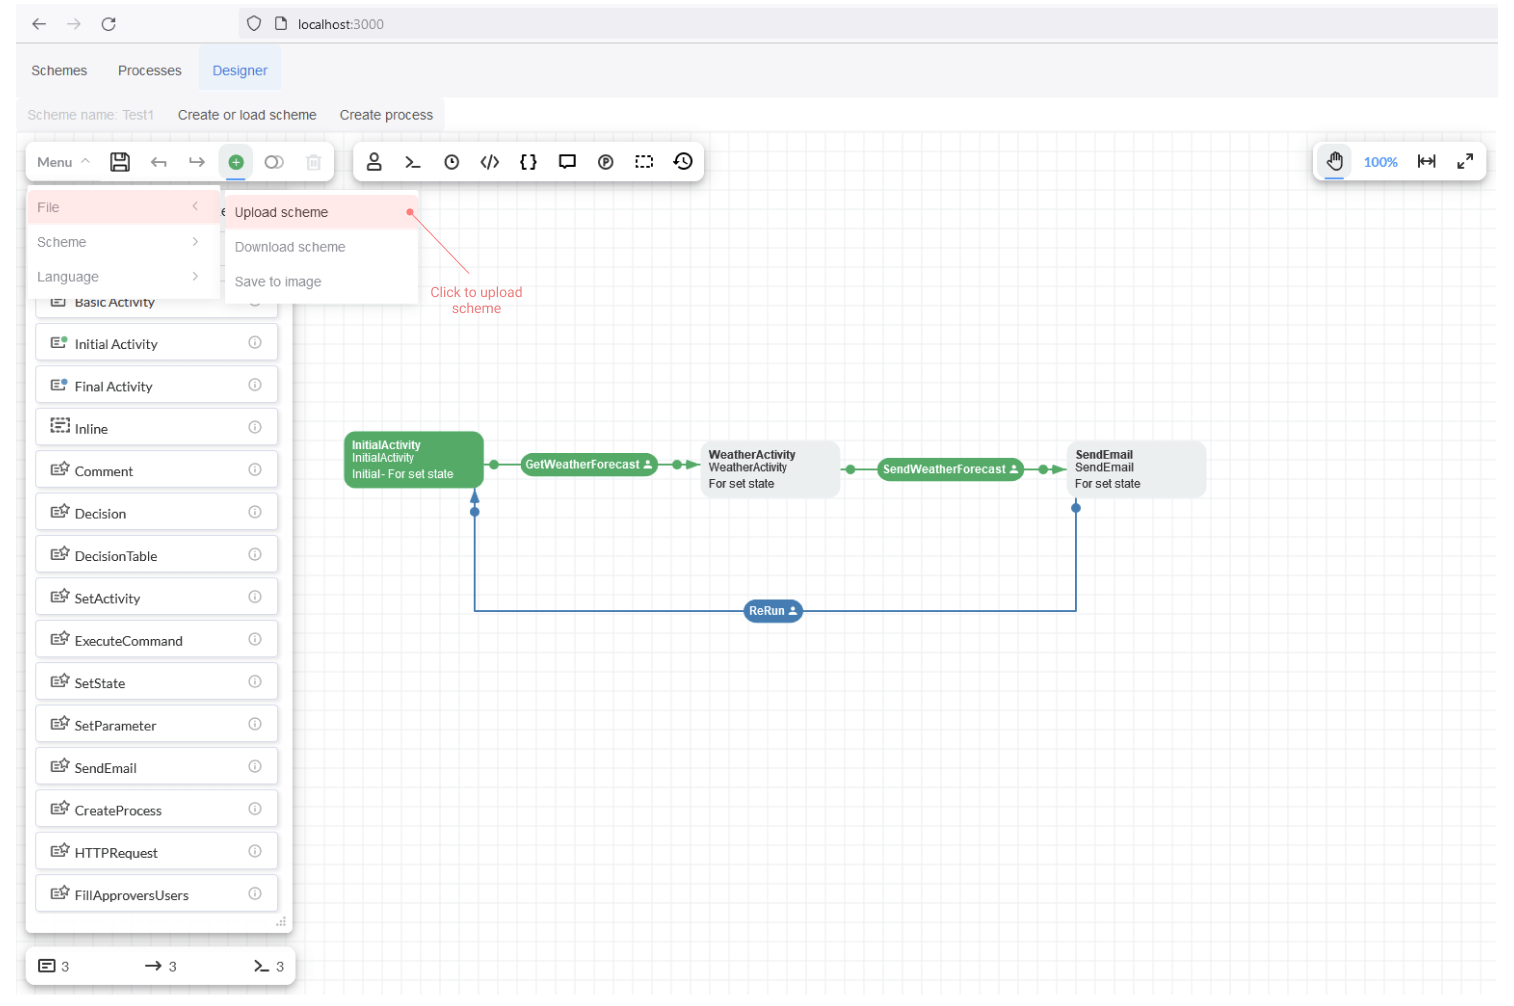
Upload the scheme provided in the first tutorial.

Conclusion
That's it! We showed in this tutorial how you can run the React sample application in Docker Compose.