Configuring and using BPMN plugin
Now that we've familiarized ourselves with the terminology and how BPMN elements are transformed into Workflow Engine scheme elements, let's look at how to start using these features.
Connecting BpmnPlugin
First, connect the package with BpmnPlugin to the project where your WorkflowRuntime is initialized.
dotnet add package OptimaJet.Workflow.BpmnPlugin
Next, connect the BpmnPlugin to the Workflow Runtime.
var bpmnPlugin = new BpmnPlugin();
var runtime = new WorkflowRuntime()
...
.WithPlugin(bpmnPlugin)
...
.Start();
After that, you need to restart your project, and you will be able to use BPMN import and BPMN elements in the designer.
Using BPMN Elements in the scheme Designer
After connecting the plugin, a new tab will appear on the Elements panel.
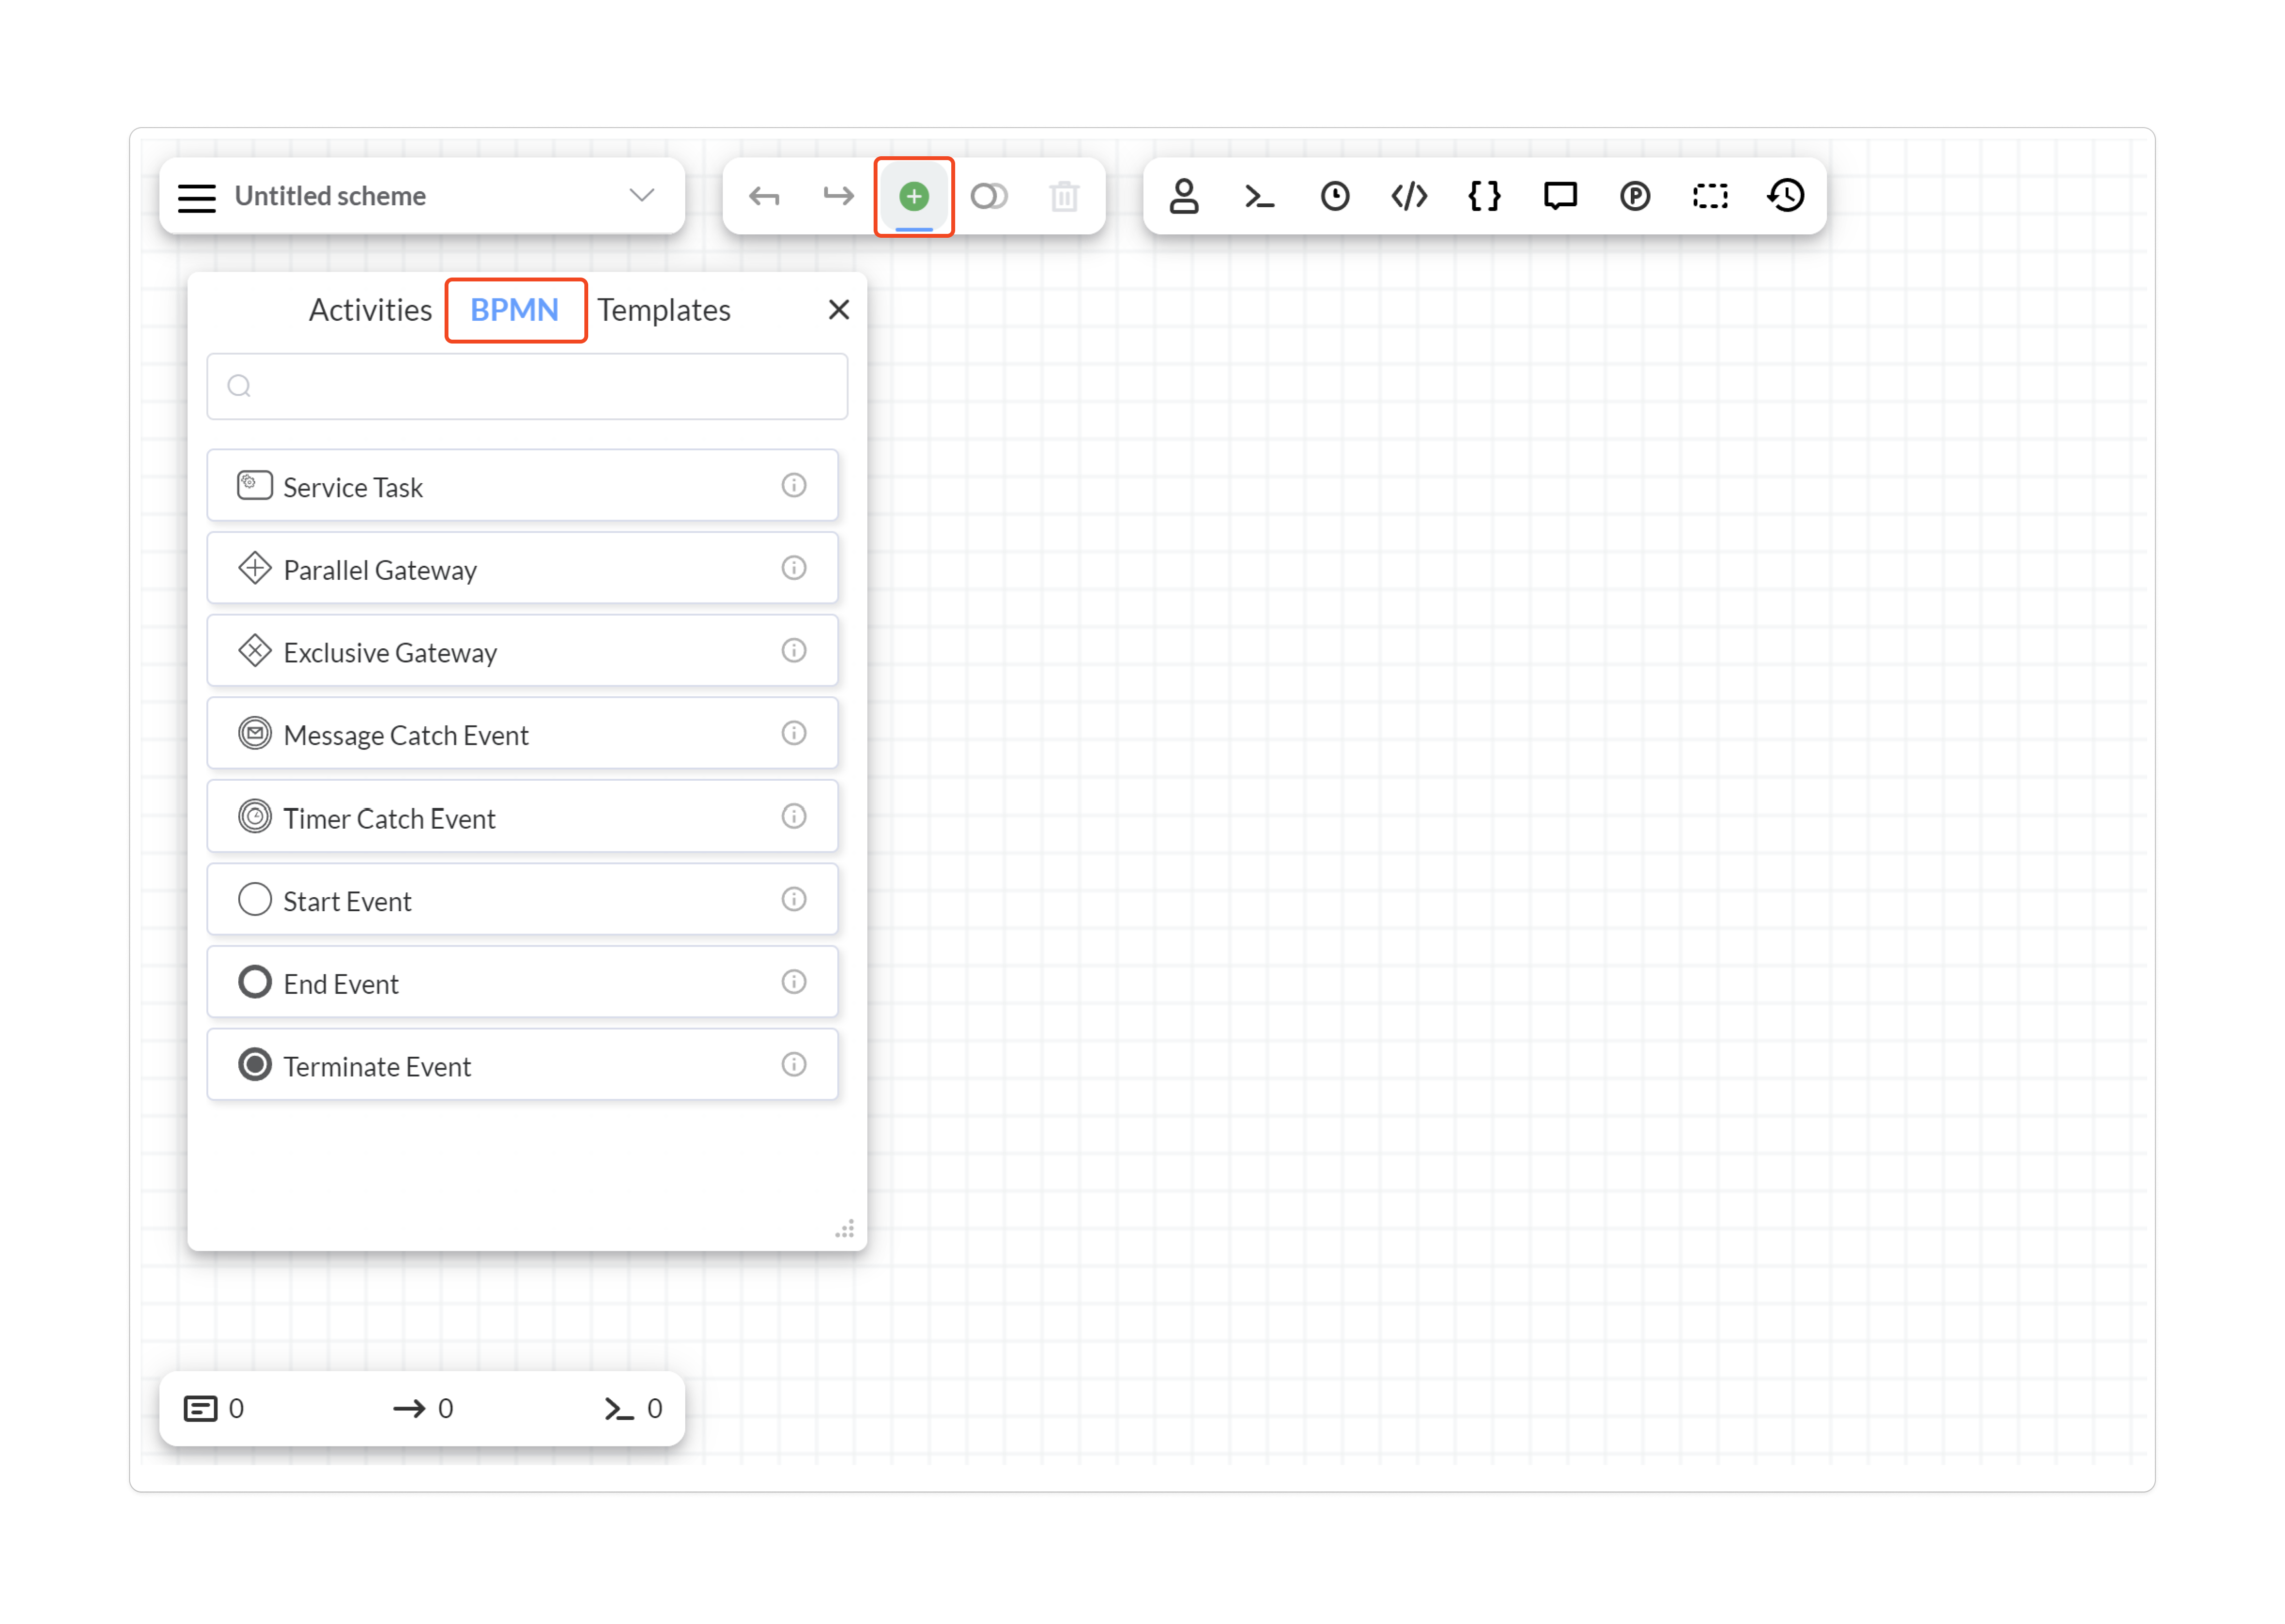
You can drag and drop BPMN elements from this panel and use them to build your scheme. The Parallel Gateway will be especially useful for creating simpler parallel processes compared to using the original Workflow Engine elements.
Importing BPMN diagram into Workflow Engine
After connecting the plugin, a new menu item, Upload BPMN, will appear.
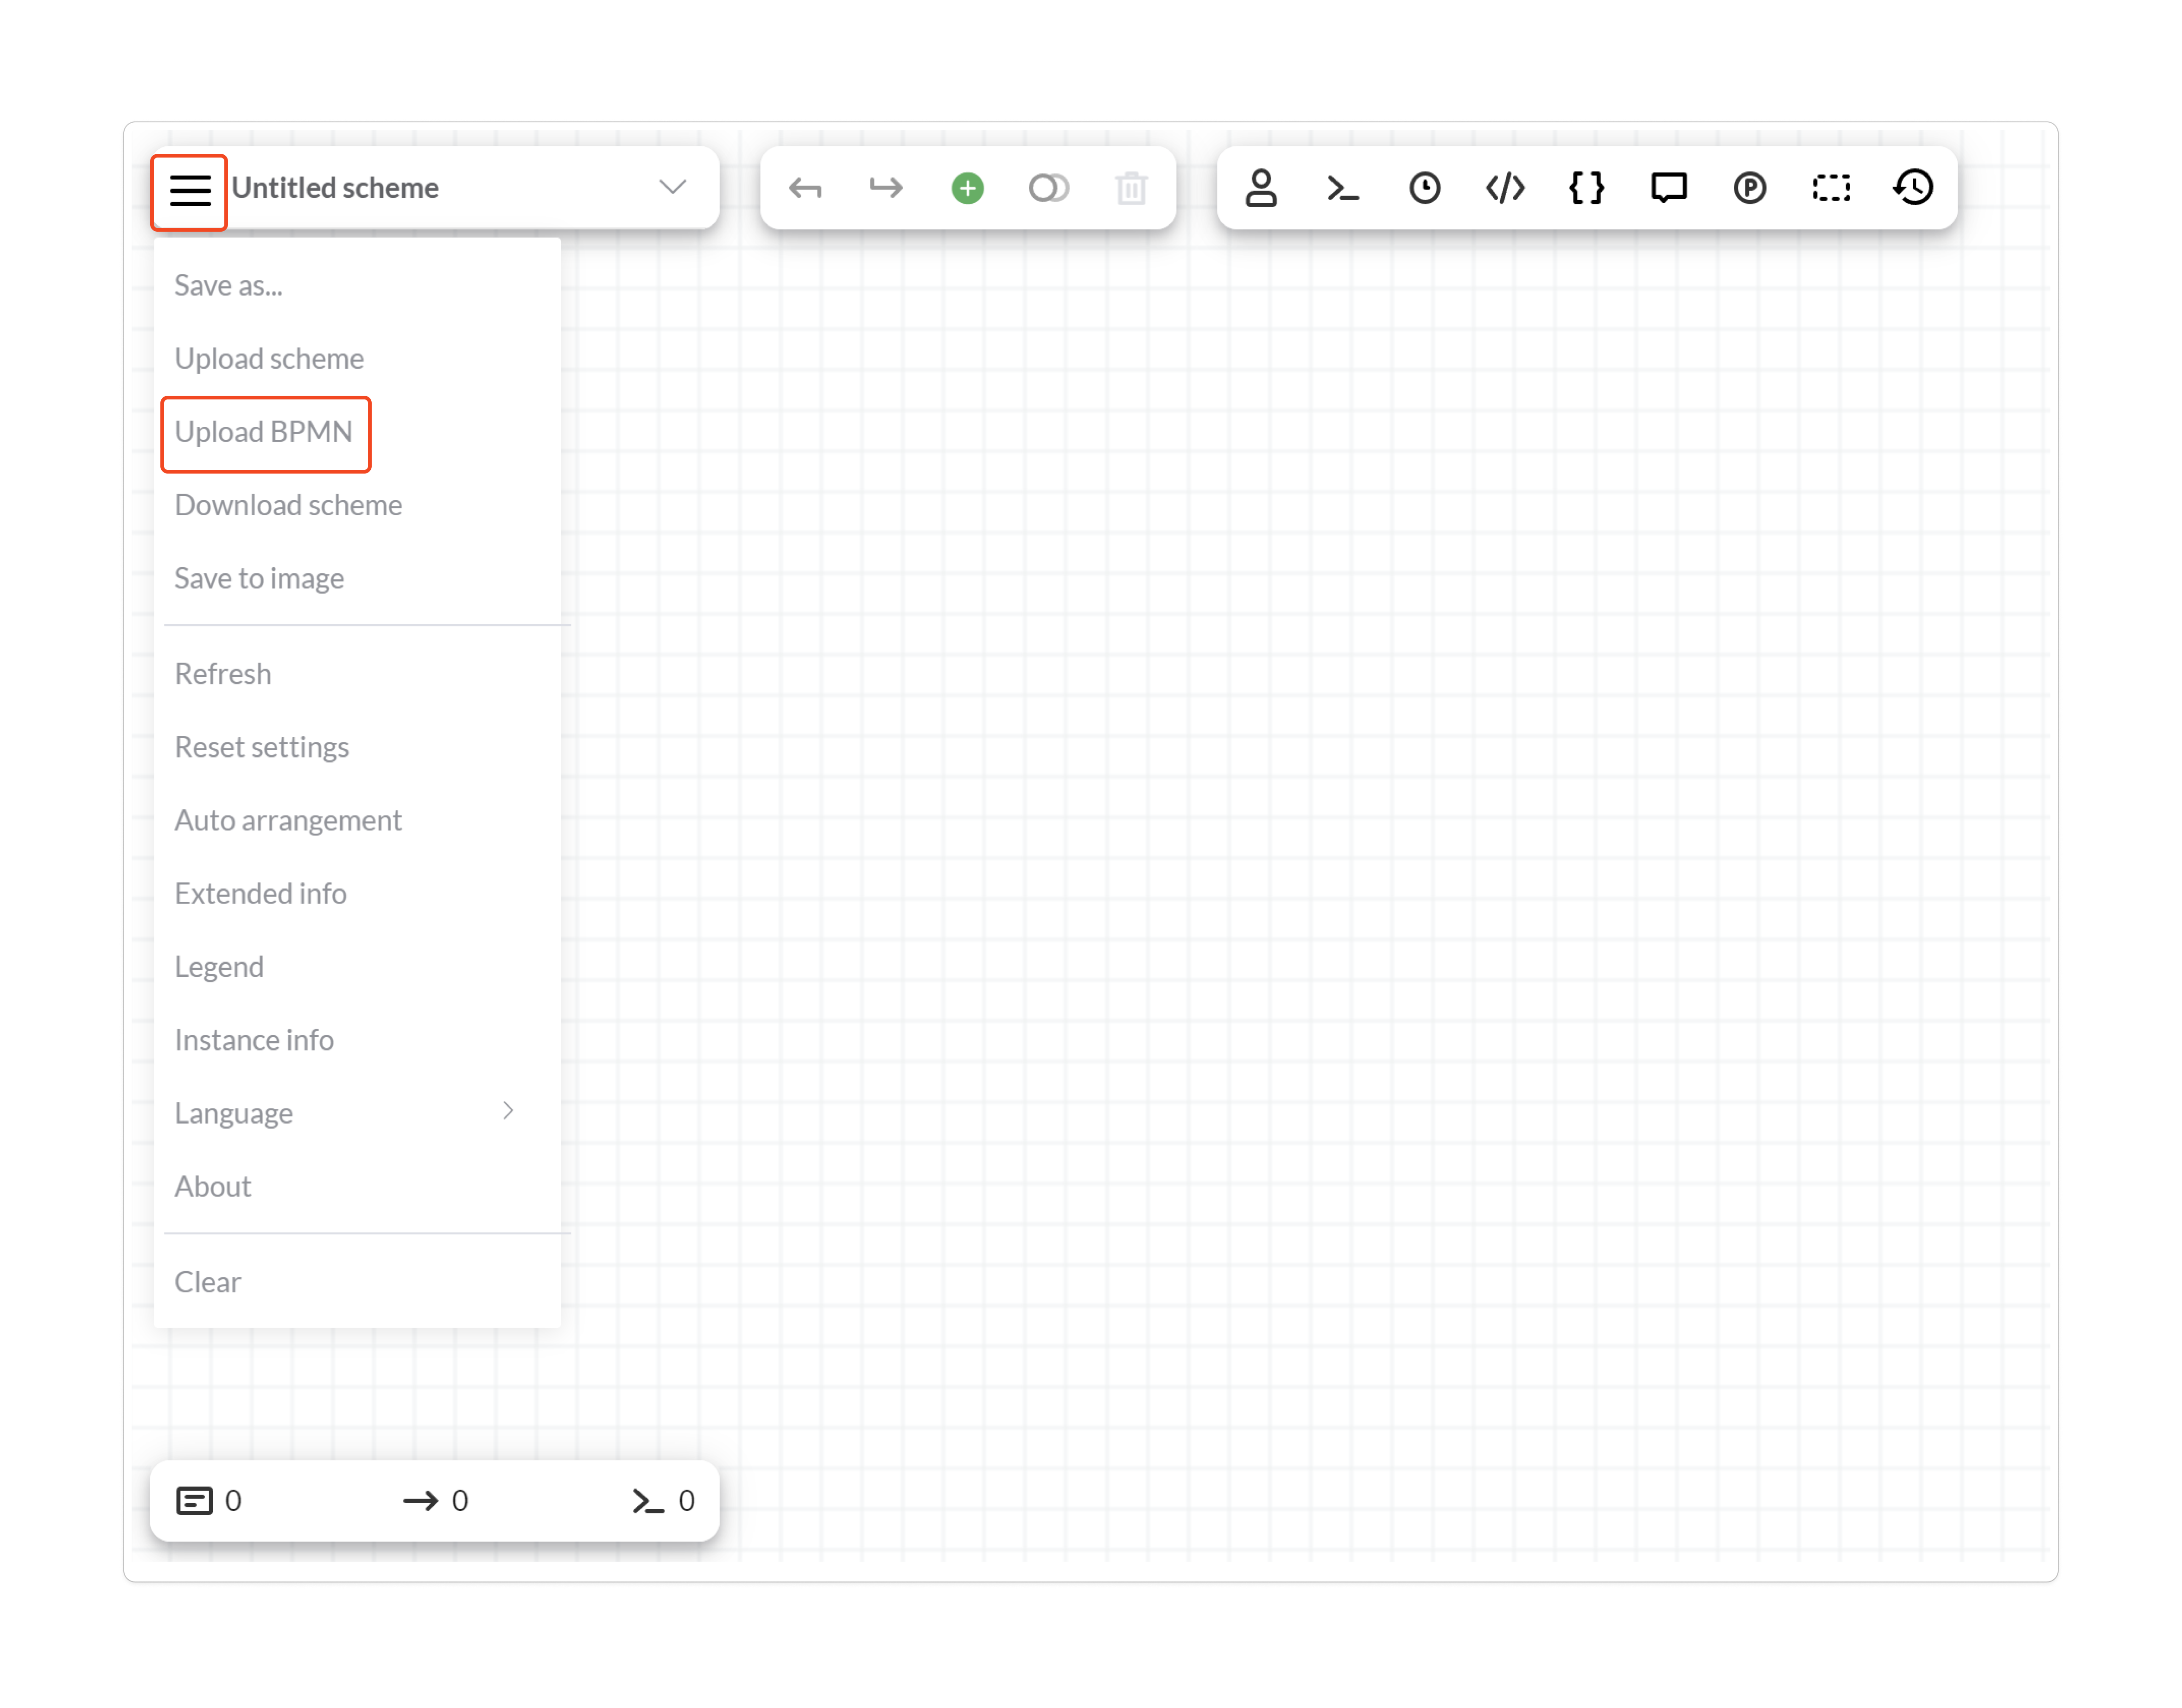
Click on this menu item and upload a file containing the BPMN diagram. After that, a dialog box with import settings will appear.
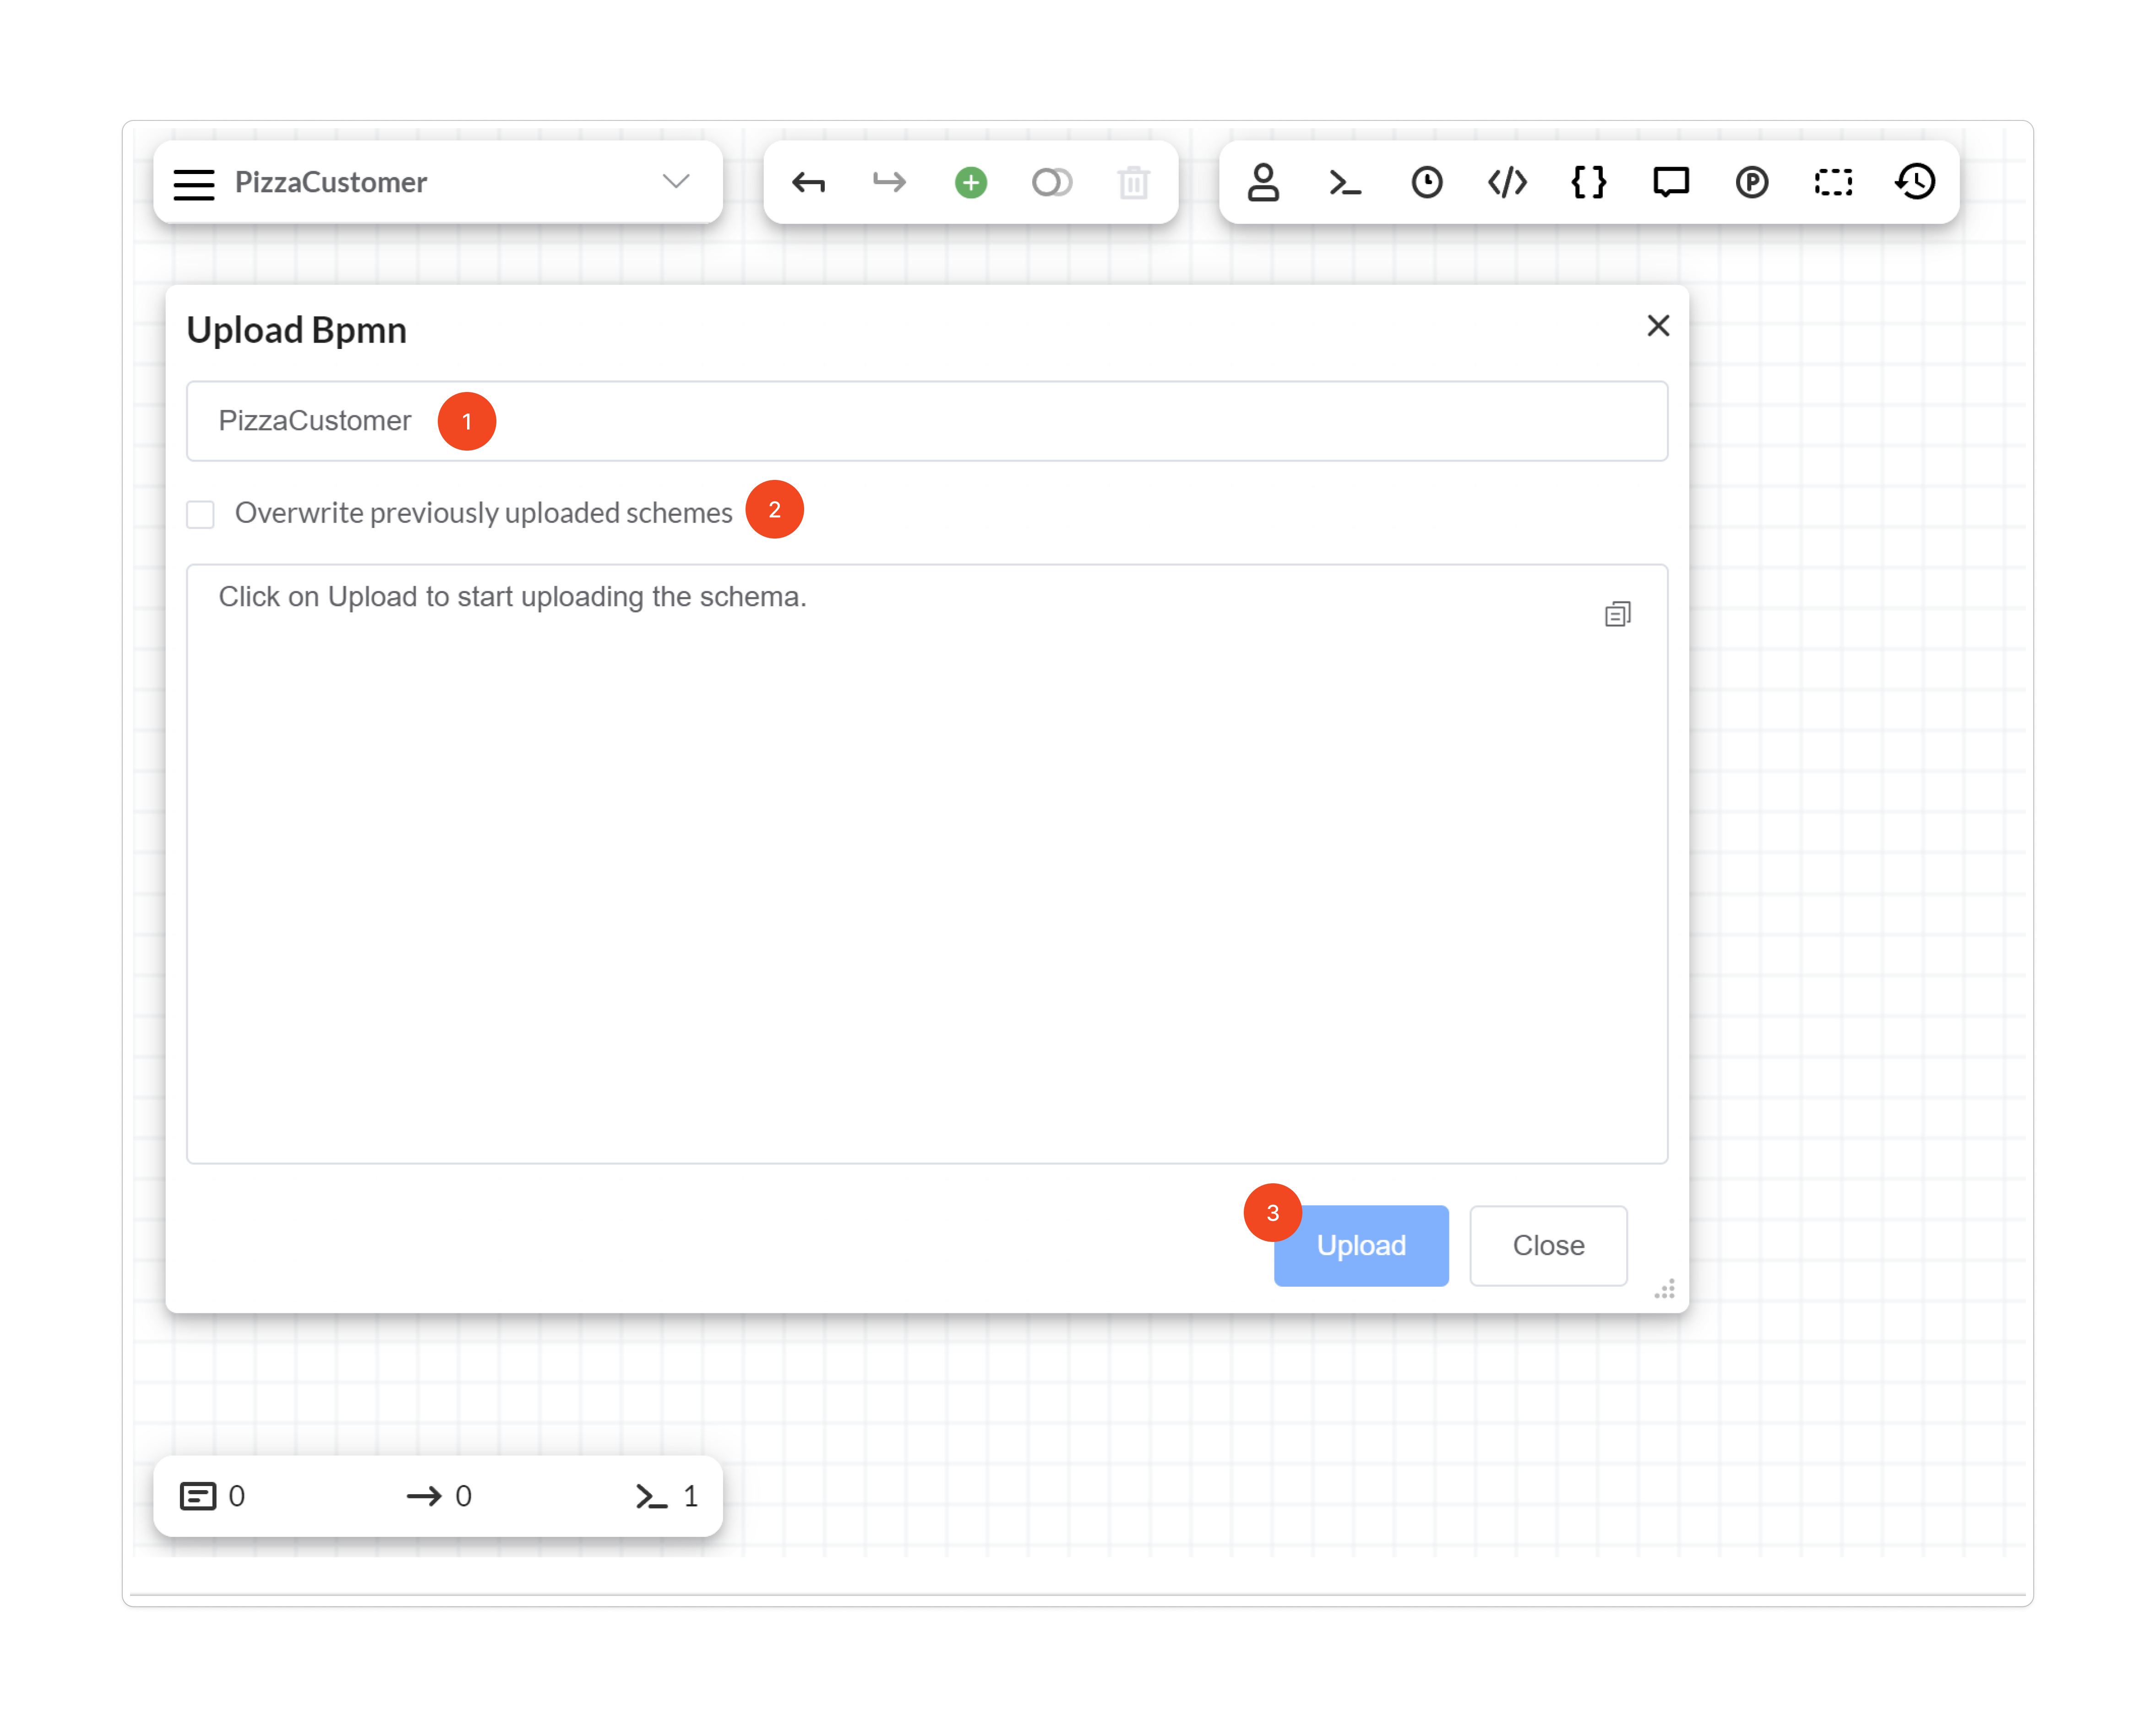
In this window, you will need the following elements:
- Main Scheme Code: If the BPMN diagram contains multiple processes, the first one will be loaded with this scheme code, and the others will be loaded with codes corresponding to the process name, if provided; otherwise, the process ID will be used. By default, this field will contain the code of the scheme currently open in the designer. You can clear this code to allow the main scheme's code to be determined automatically.
- Checkbox "Overwrite previously uploaded schemes": Check this box if you want the import to overwrite schemes that are already in the database. By default, it is unchecked to reduce the risk of overwriting modified and adjusted schemes.
- To start the import process, click the Upload button.
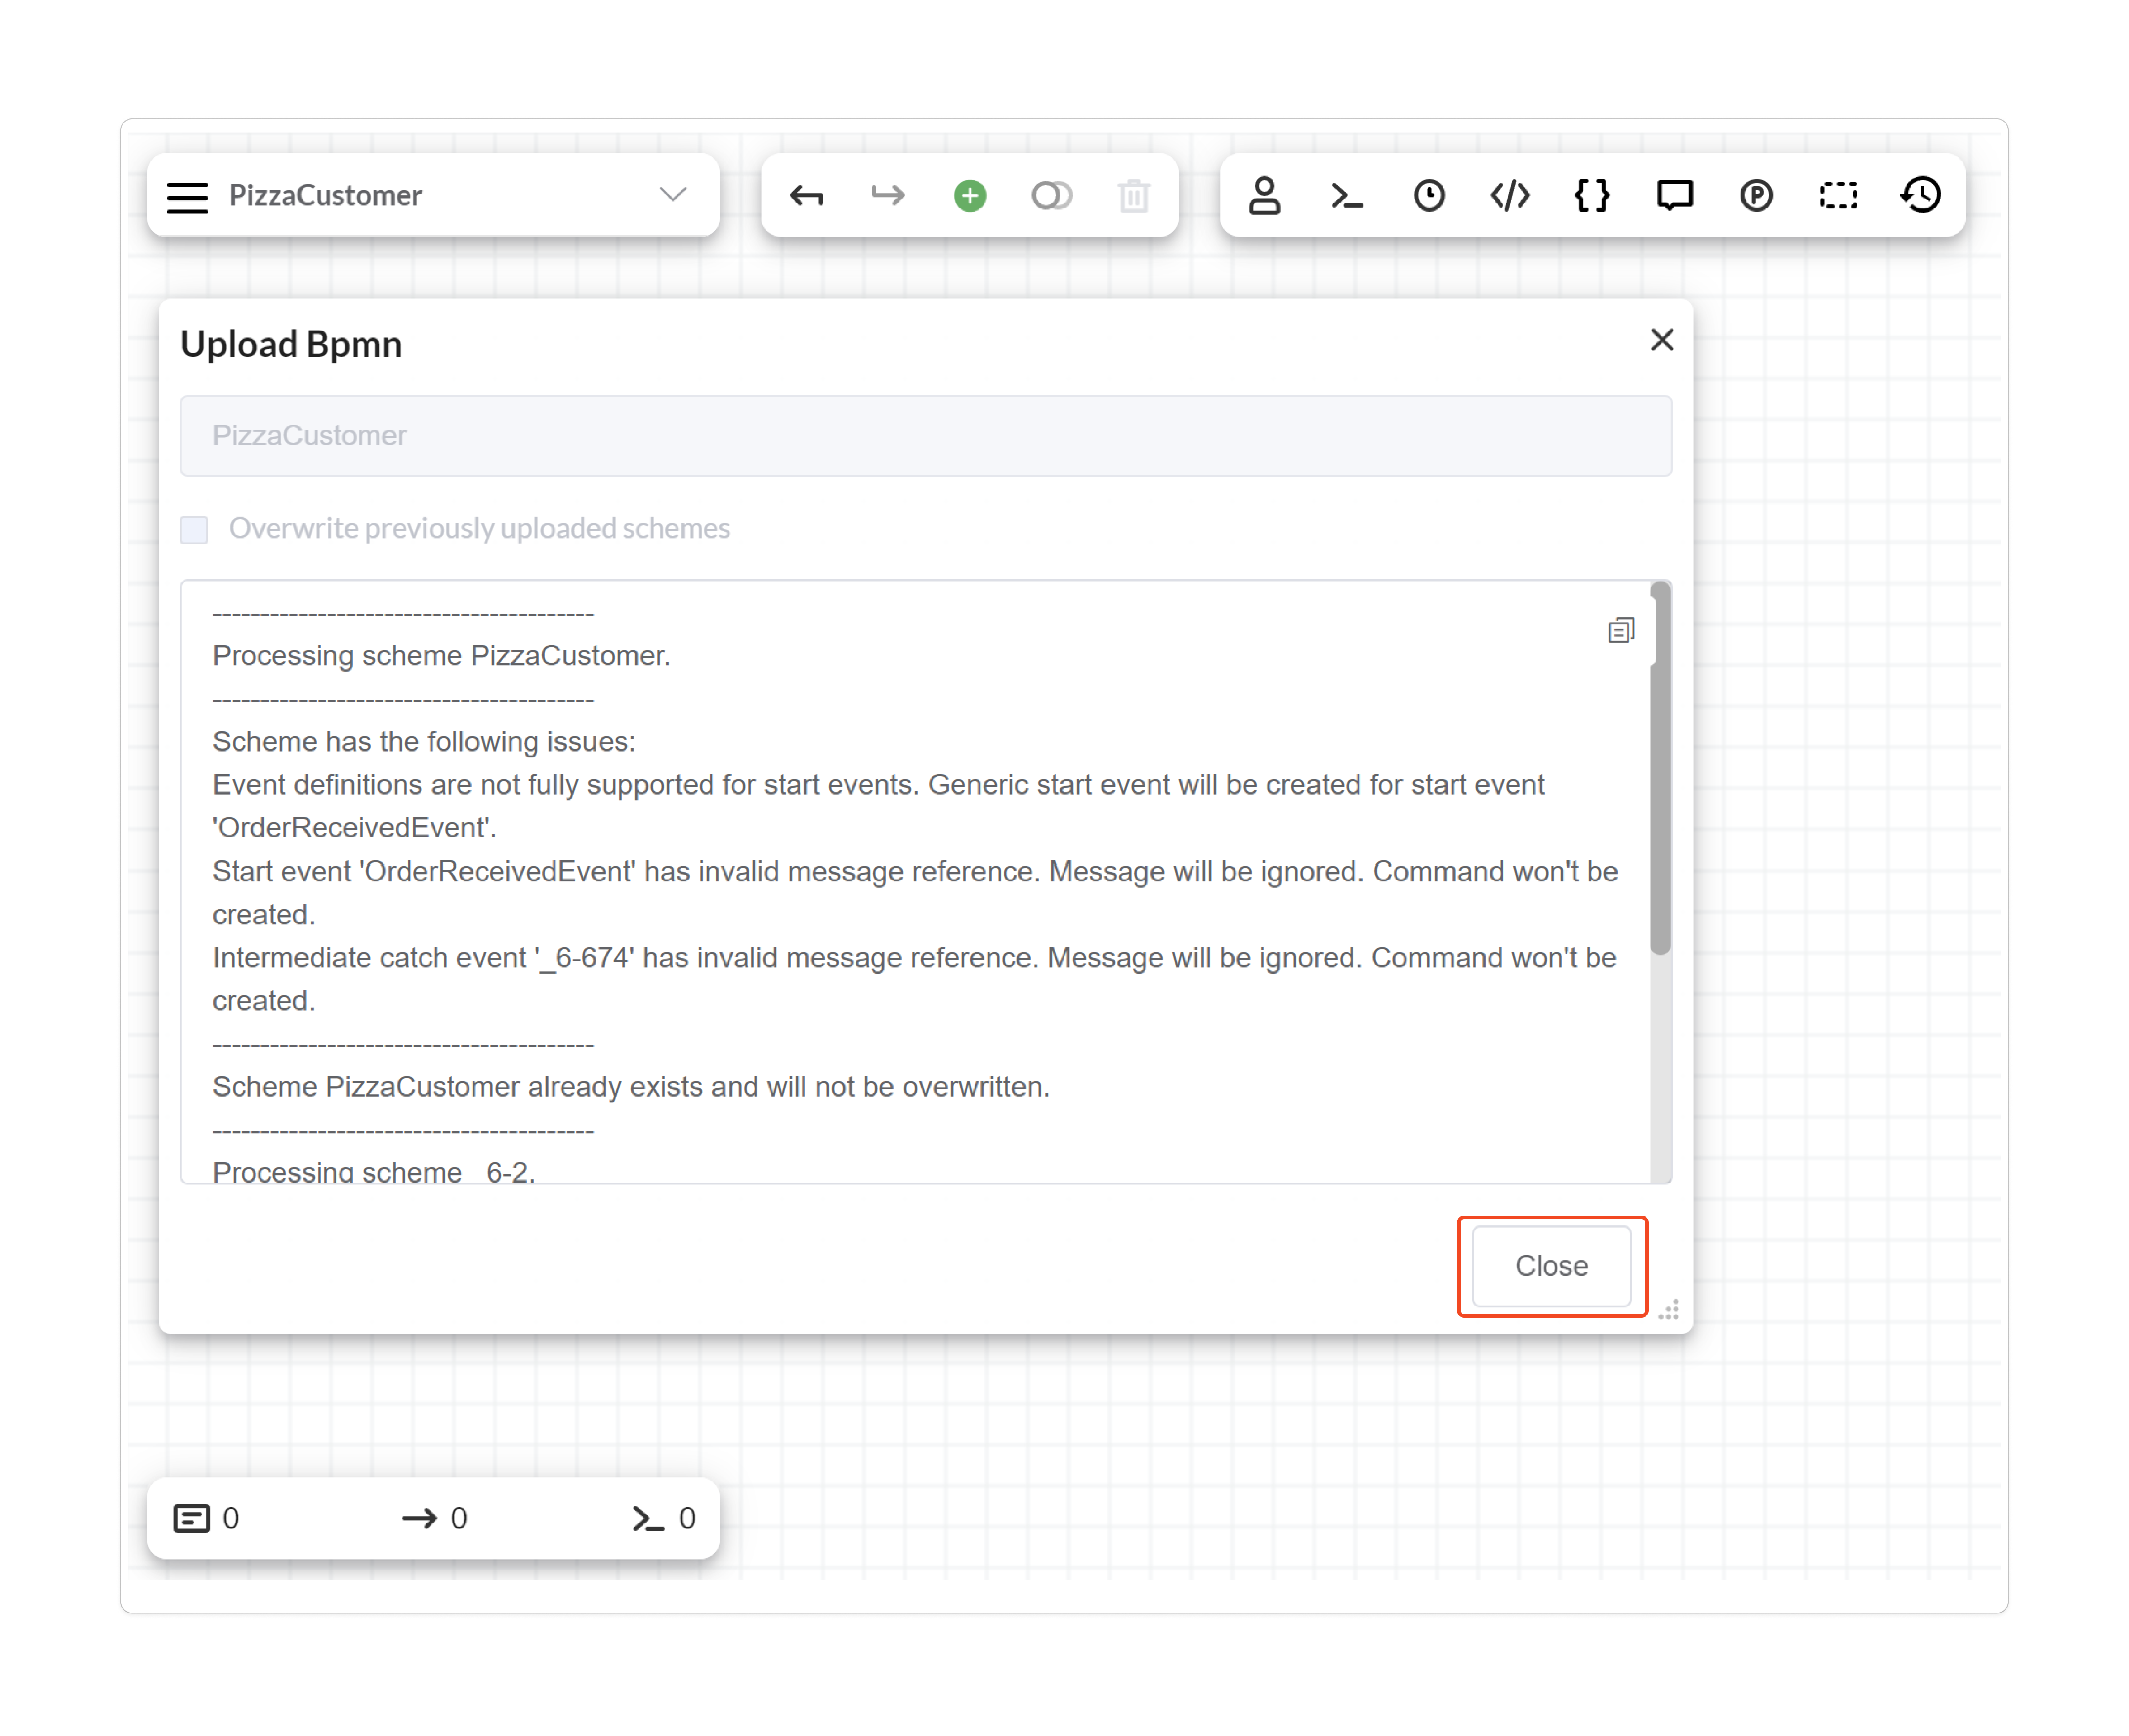
After the import is completed, the window will appear as follows.
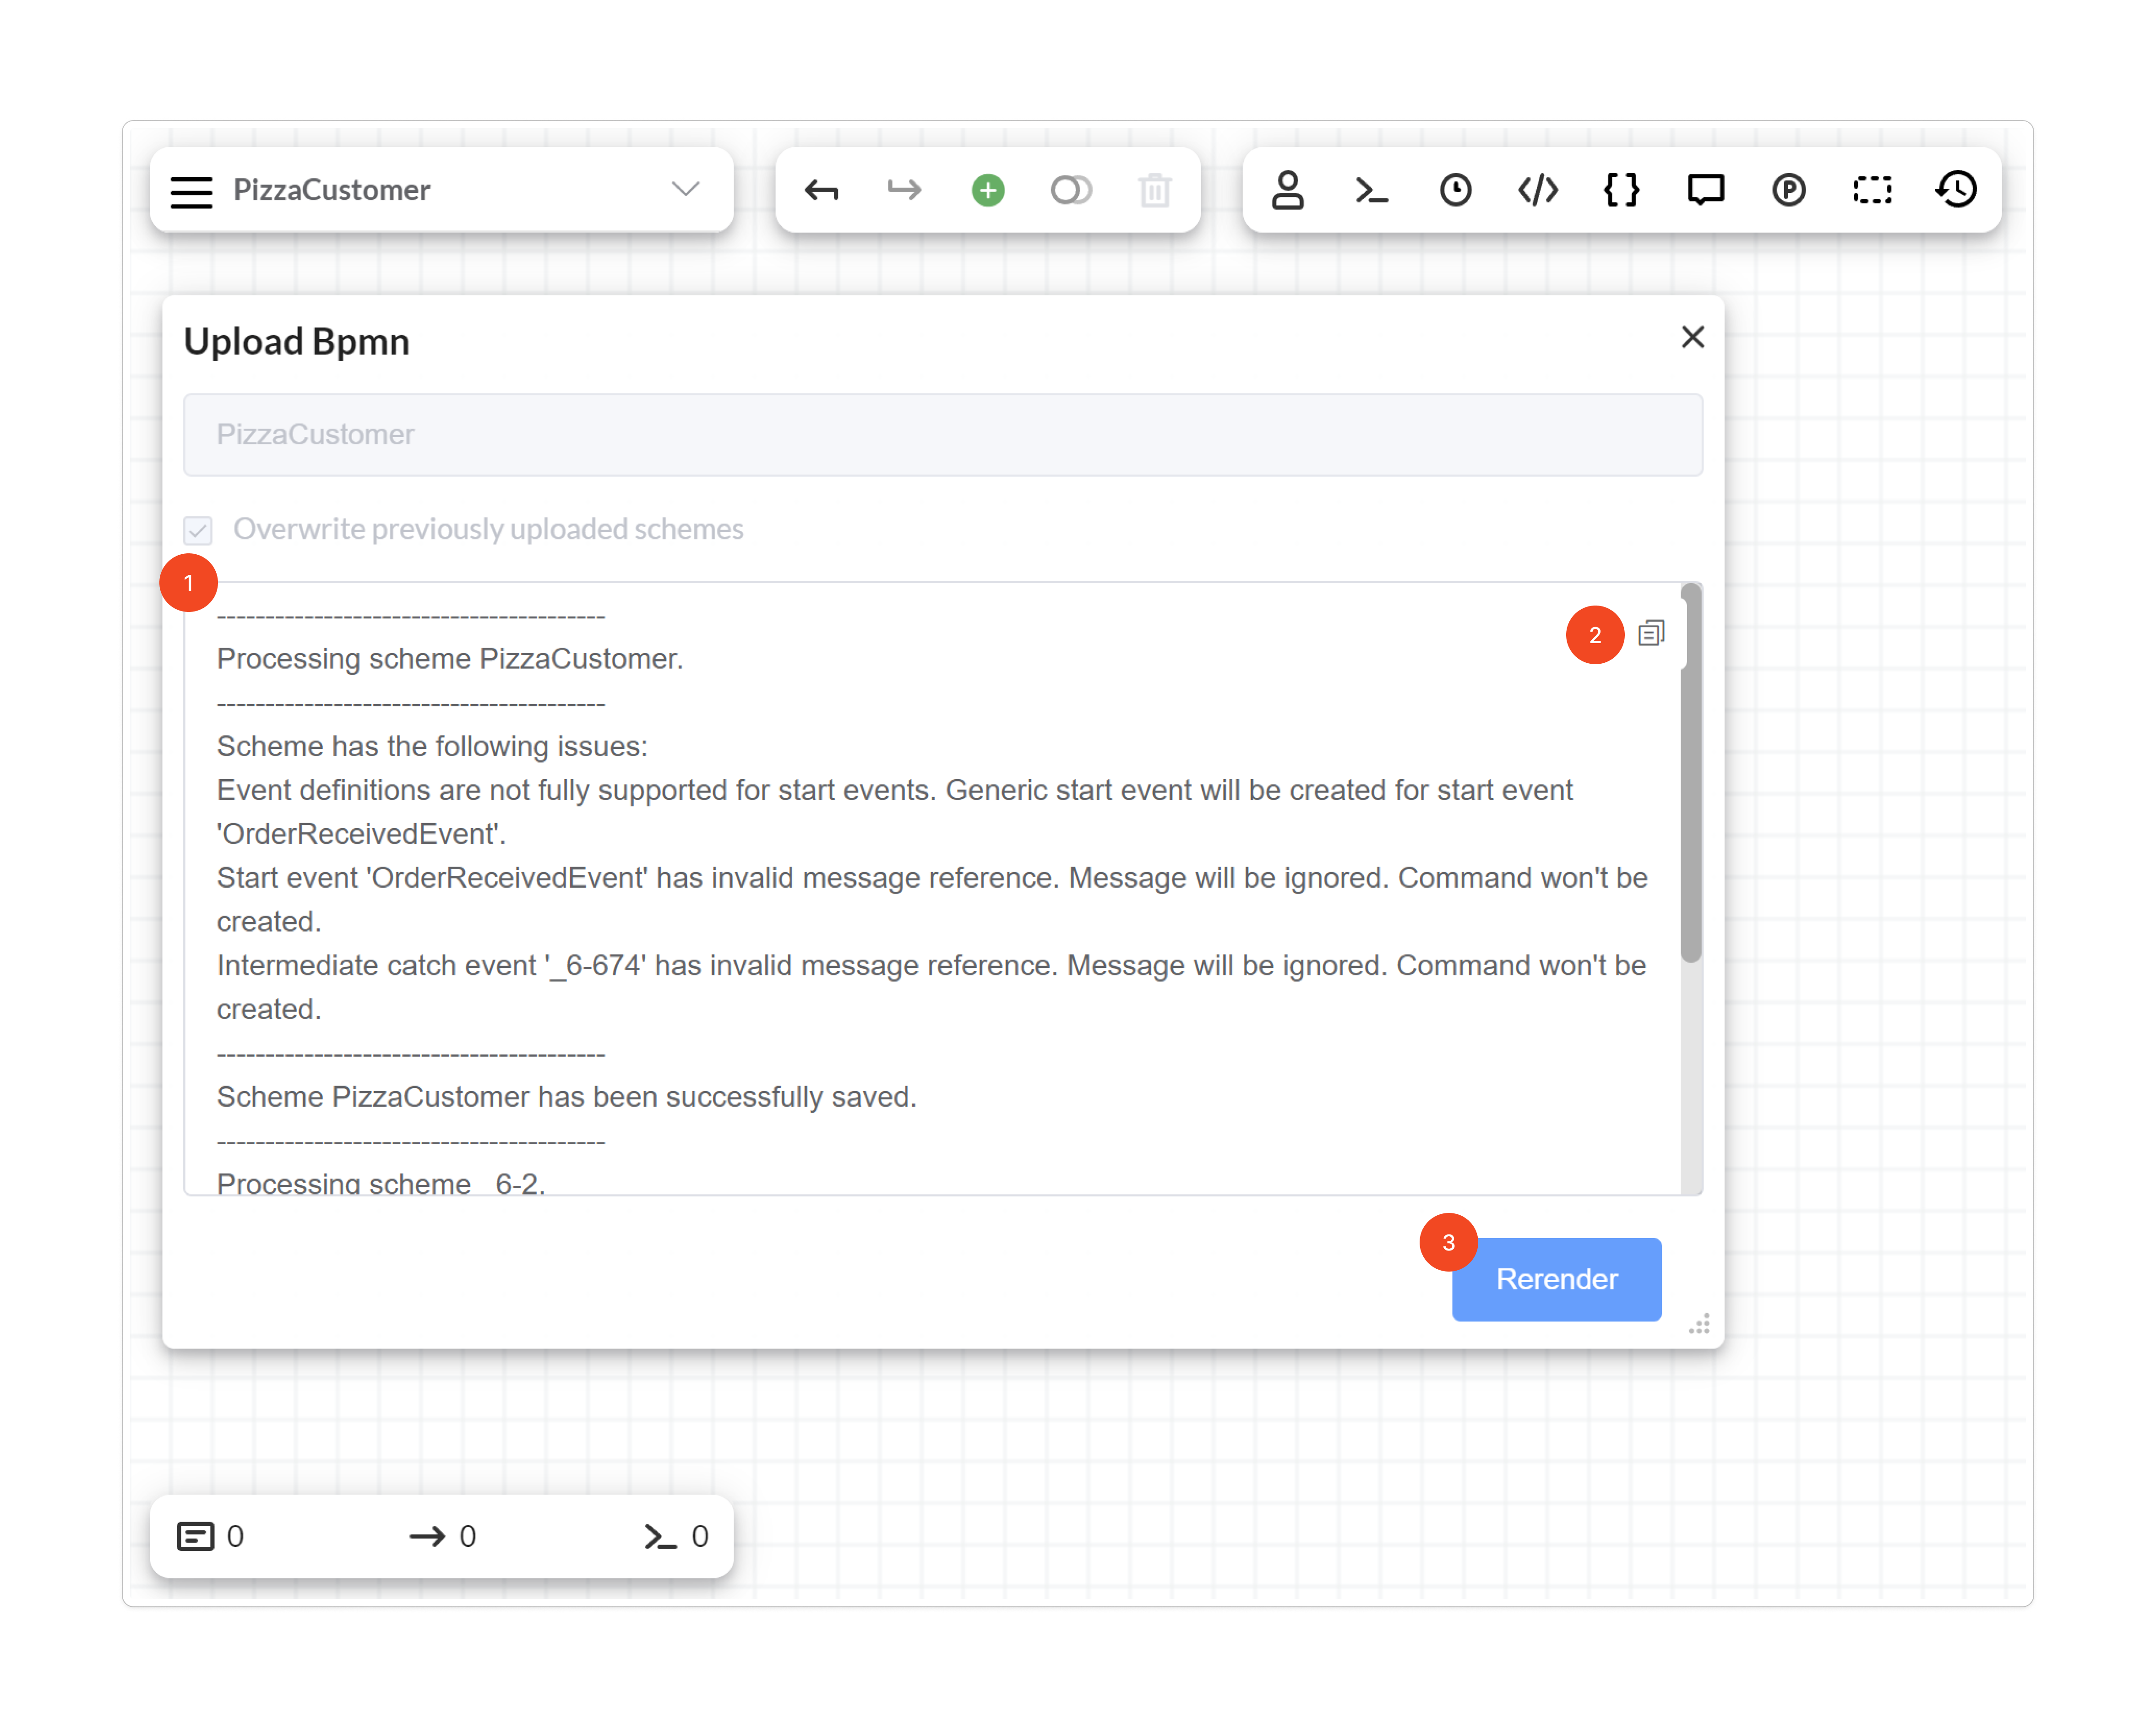
- You will have access to the import log, which you can review and analyze.
- The import log can be copied and sent, for example, to technical support.
- After analyzing the log, click the Rerender button to refresh the designer window and see the new scheme.
If the scheme displayed in the designer has a different code from the one uploaded, or the main scheme was not uploaded, you will see a
Close button instead of the Rerender button.
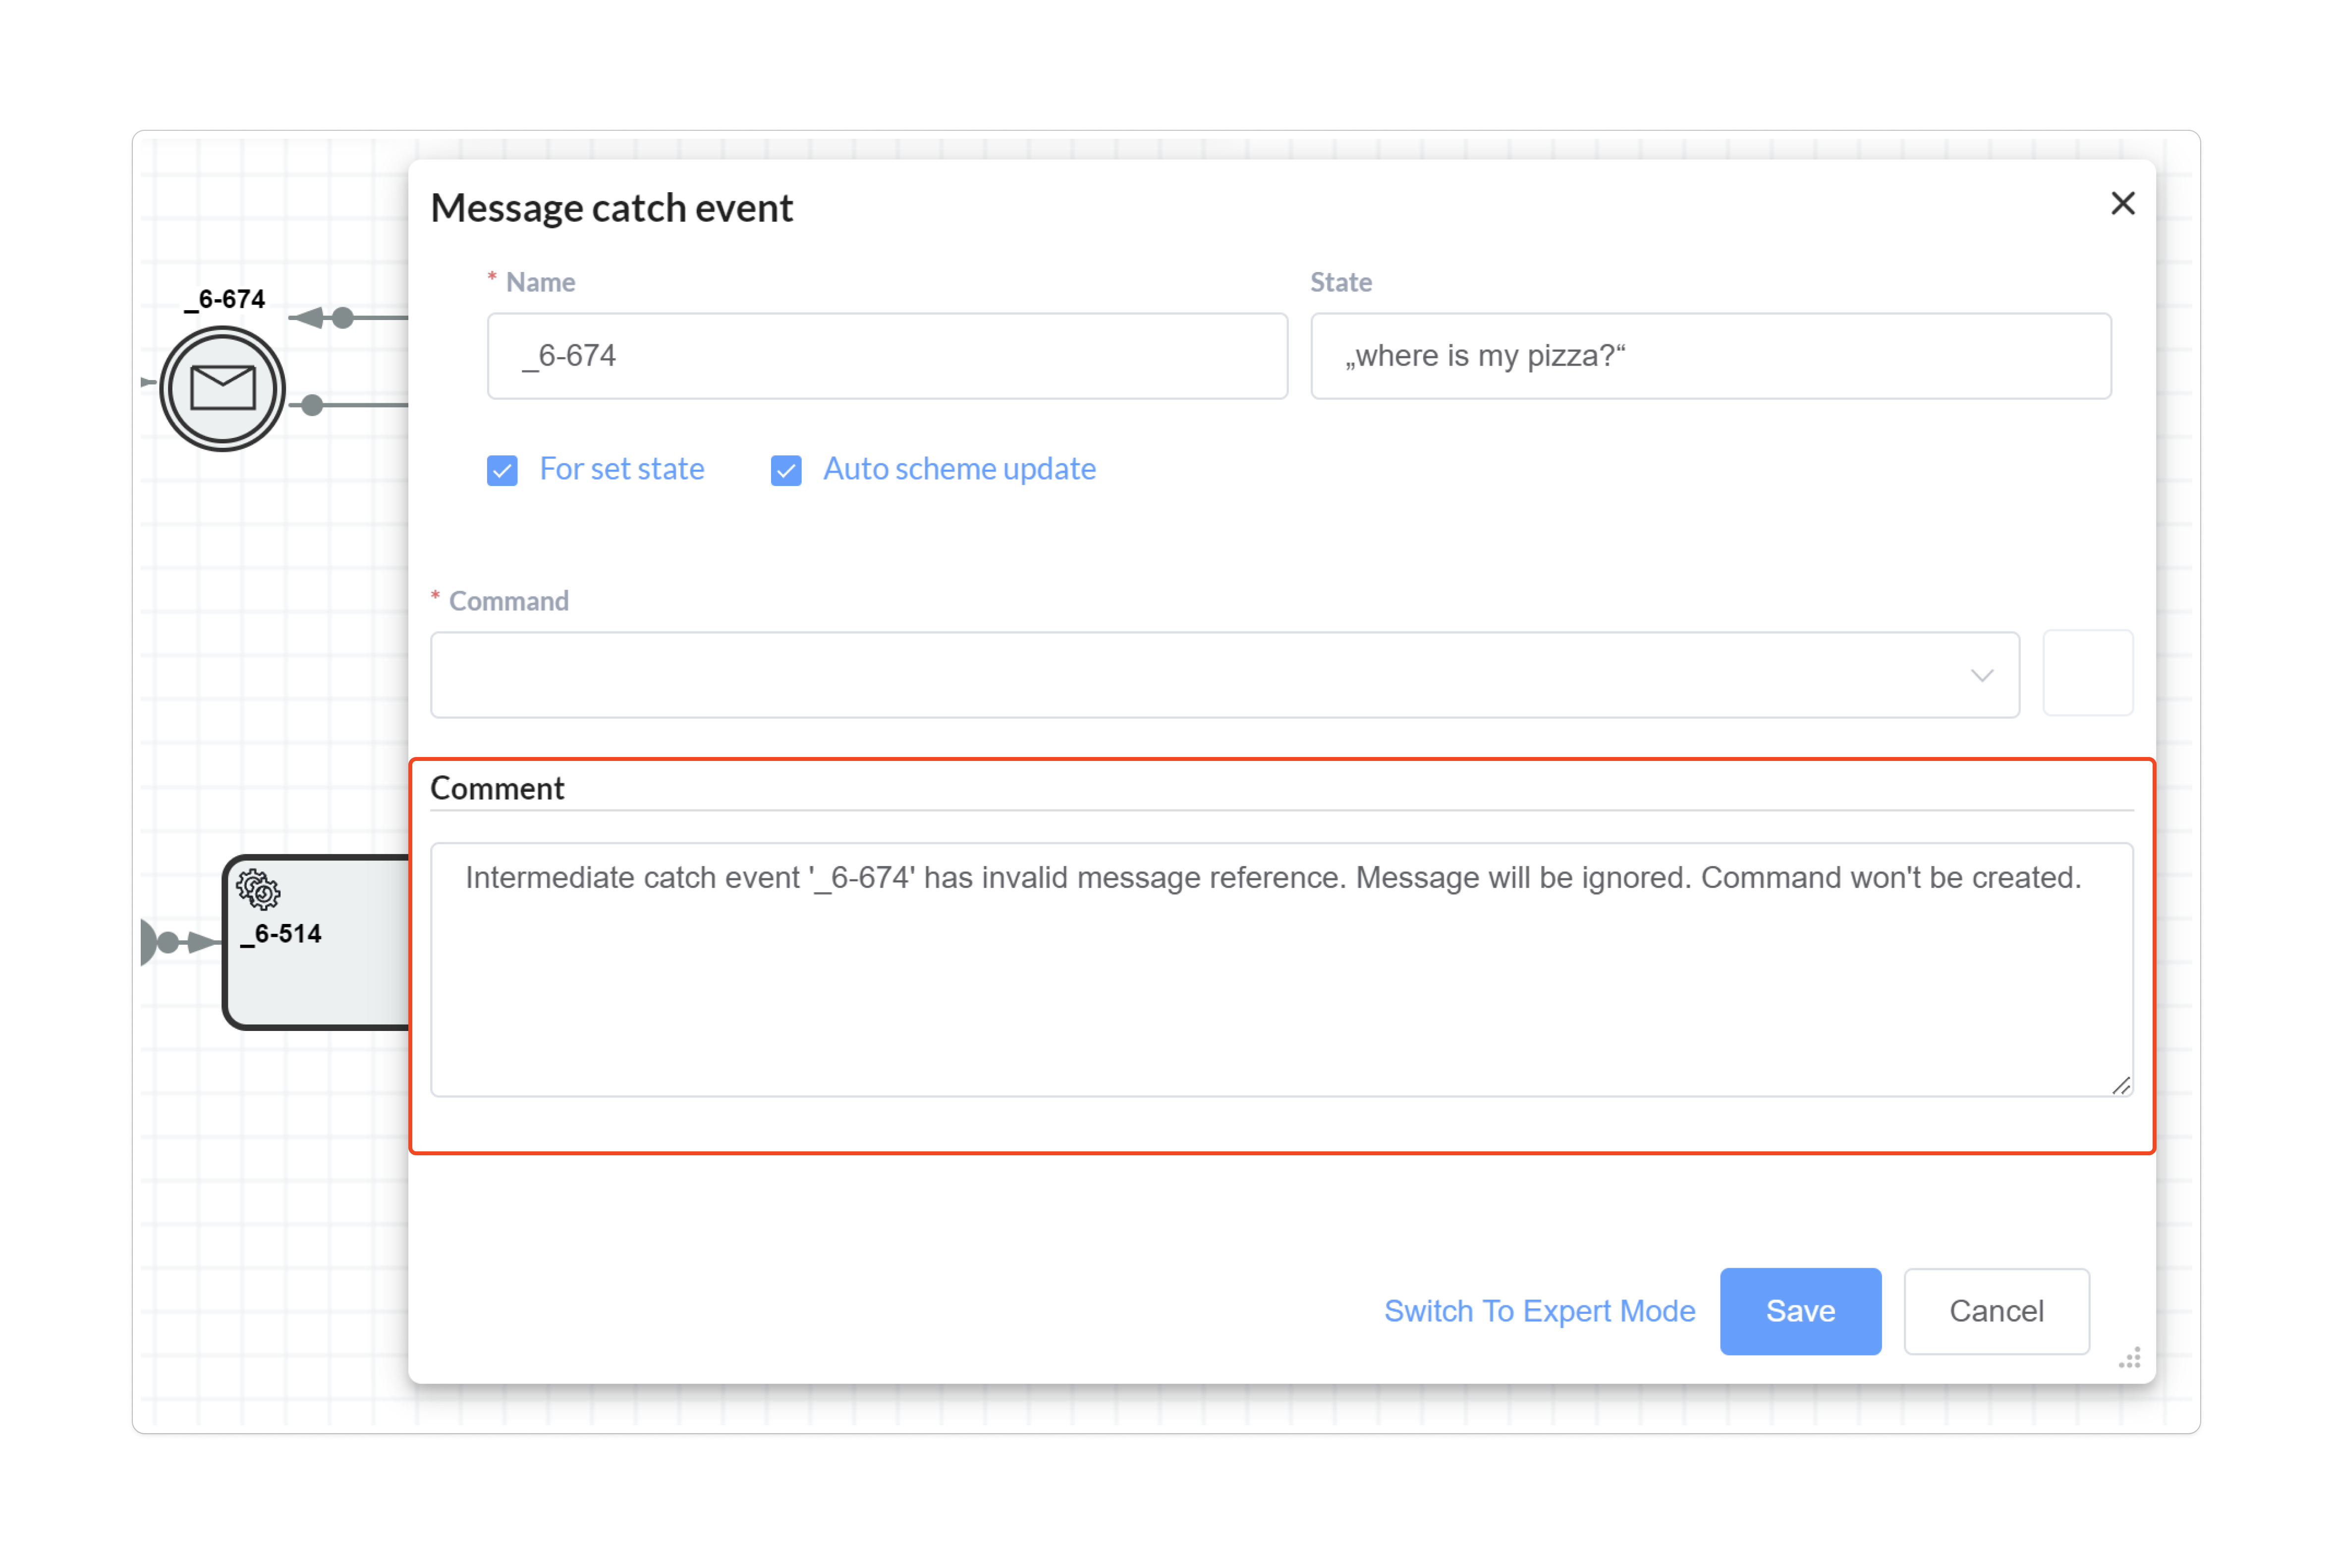
In addition to the log, messages about potential issues during the import are added directly in the comments to the corresponding elements.
Customizing the import
To customize the import process, you need to inherit the class responsible for importing the element you want to modify. Here's a list of classes you can inherit:
- TaskNodeVisitor — Customizes how BPMN Tasks are transformed into Activities.
- GatewayNodeVisitor — Customizes how BPMN Gateways are transformed into Activities.
- EventNodeVisitor — Customizes how BPMN Events are transformed into Activities.
- SubprocessNodeVisitor — Customizes how BPMN Subprocesses are transformed into Inline Activities.
- CallActivityNodeVisitor — Customizes how BPMN Call Activities are transformed into Activities.
- TaskFlowVisitor — Customizes how Sequence Flows from BPMN Tasks are transformed into Transitions.
- GatewayFlowVisitor — Customizes how Sequence Flows from BPMN Gateways are transformed into Transitions.
- EventFlowVisitor — Customizes how Sequence Flows from BPMN Events are transformed into Transitions.
- SubprocessFlowVisitor — Customizes how Sequence Flows from BPMN Subprocesses are transformed into Transitions.
- CallActivityFlowVisitor — Customizes how Sequence Flows from BPMN Call Activities are transformed into Transitions.
- ProcessVisitor — Full customization of the BPMN process import.
For example, if you want to implement a custom import for Call Activity, you need to inherit from CallActivityNodeVisitor and write your own implementation of the import.
public class CustomCallActivityNodeVisitor : CallActivityNodeVisitor
{
    public override void AddCallActivity(TCallActivity callActivity, BpmnConverterContext context)
    {
        IActivityBuilder activityBuilder = context.Builder.CreateActivity(callActivity.Id);
        if (!string.IsNullOrWhiteSpace(callActivity.Name))
        {
            activityBuilder
                .State(callActivity.Name)
                .EnableSetState();
        }
        else
        {
            activityBuilder.NotState();
        }
    }
}
Then, you need to create an instance of BpmnConverterBuilder, specify your custom CustomCallActivityNodeVisitor, and use the Build method to create a new converter.
BpmnConverter customBpmnConverter = BpmnConverterBuilder
    .Create()
    .WithCustomCallActivityNodeVisitor(new CustomCallActivityNodeVisitor())
    .Build();
After that, you need to specify the created converter during the initialization of BpmnPlugin.
var bpmnPlugin = new BpmnPlugin(customBpmnConverter);
var runtime = new WorkflowRuntime()
...
.WithPlugin(bpmnPlugin)
...
.Start();
This way, you can partially modify the import behavior. Additionally, the Build() method accepts settings, whose values can be found in the API reference.