Languages
There are several elements that might be customized in the visual scheme designer which represents an outstanding advantage and a relevant feature by considering a wide groups of users or client's system requirements. In this article is described a brief procedure to add a new language to the Workflow Engine Designer and enabling it through the Designer UI.
![]()
Adding a custom language to Workflow Engine Designer
First, the WorkflowEngine.NET project repository should be reviewed. The language files that are available for translating purposes can be found through the project root directory in the following location:
└─ WorkflowEngine.NET
  └─ Designer
    └─ Localization
In the Localization directory, the file
en_default.json can be used as
template. It can be translated to the language of your preference. The translation can be completed by using Google Translate or a similar
tool and any available open-source text and source code editor. Once the JSON file has been translated, the modified file should be saved in
this directory and named according the standard language codes as follows:
<lang-code>.json
For instance, a translated file el.json to implement Greek language:
{
  "LangInfo": {
    "code": "el",
    "dialect": "HE",
    "name": "Greek",
    "description": "Greek native",
    // "bidi": "rtl"  // this is an optional parameter for right-to-left locales
  },
  "DeleteConfirm": "Είστε βέβαιοι ότι θέλετε να διαγράψετε επιλεγμένα στοιχεία;",
  "DeleteConfirmCurrent": "Είστε βέβαιοι ότι θέλετε να διαγράψετε αυτό το στοιχείο;",
  "EscapeConfirm": "Υπάρχουν μη αποθηκευμένες αλλαγές. Θέλετε να αποθηκεύσετε το σχήμα;",
  "FieldIsRequired": "Το πεδίο είναι υποχρεωτικό!",
  ...
Next, the custom language might be added by implementing the JavaScript object WorkflowDesigner.
In this case the translated json file and JavaScript library for the specific language must be imported and called it through the array customLocalization: []
from the JavaScript object. Several languages may be included. An example is indicated below:
import el from './langs/el.json';
// set language for ElementUI components (https://element.eleme.cn/#/en-US/component/i18n)
import elElementUILocalization from '../element-ui/lib/locale/lang/el.js';
el.elementUILocalization = elElementUILocalization;

wfdesigner = new WorkflowDesigner({
    name: 'simpledesigner',
    apiurl: '/Designer/API',
    renderTo: 'wfdesigner',
    templatefolder: '/templates/',
    graphwidth: graphwidth,
    graphheight: graphheight,
    language: 'en',
    customLocalization: [el]
}); // JavaScript object WorkflowDesigner example
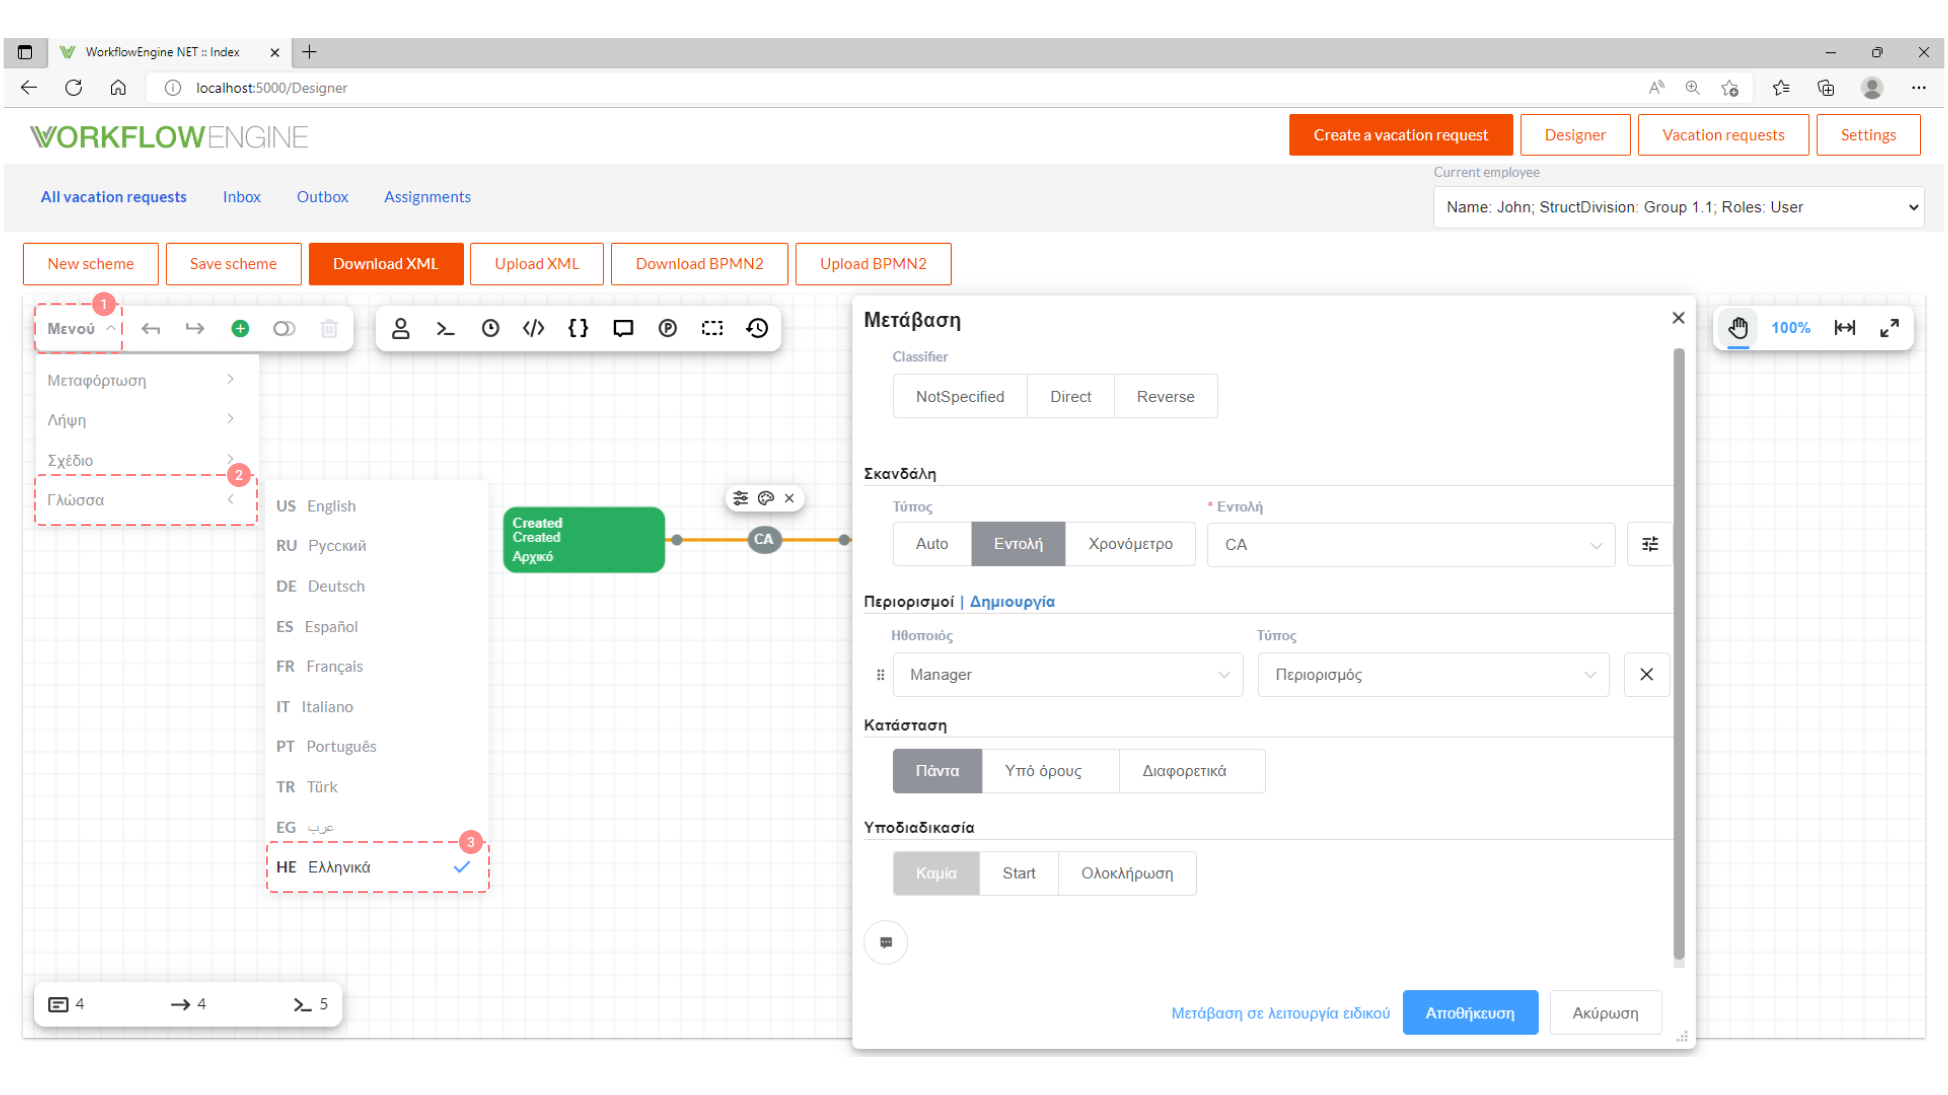
Selecting the preferred language
Once the modifications has been completed as is described in previous section, the Designer project can be run. After launching the project, the new language will be available in Workflow Engine Designer to be selected in the drop-down list 'Menu' in the section 'Language'.
Then, proceed as follows to enable the added language:
- Open the panel 'Menu'.
- Choose the option 'Language'.
- Find the preferred language and click on it.