Scheme in a nutshell
This section dwells on the objects a process scheme comprises, as well as the major methods of working with the process. The key scheme objects are Activities which may set process states and the order of the executed user code established by Actions. Transitions determine the order of process execution. Commands and Timers are key triggers that make a process change its state and do effective work. Integration with the security system and control of user access to the commands is done with the help of the Rule-Actor-Restriction.
Scheme editing in Designer
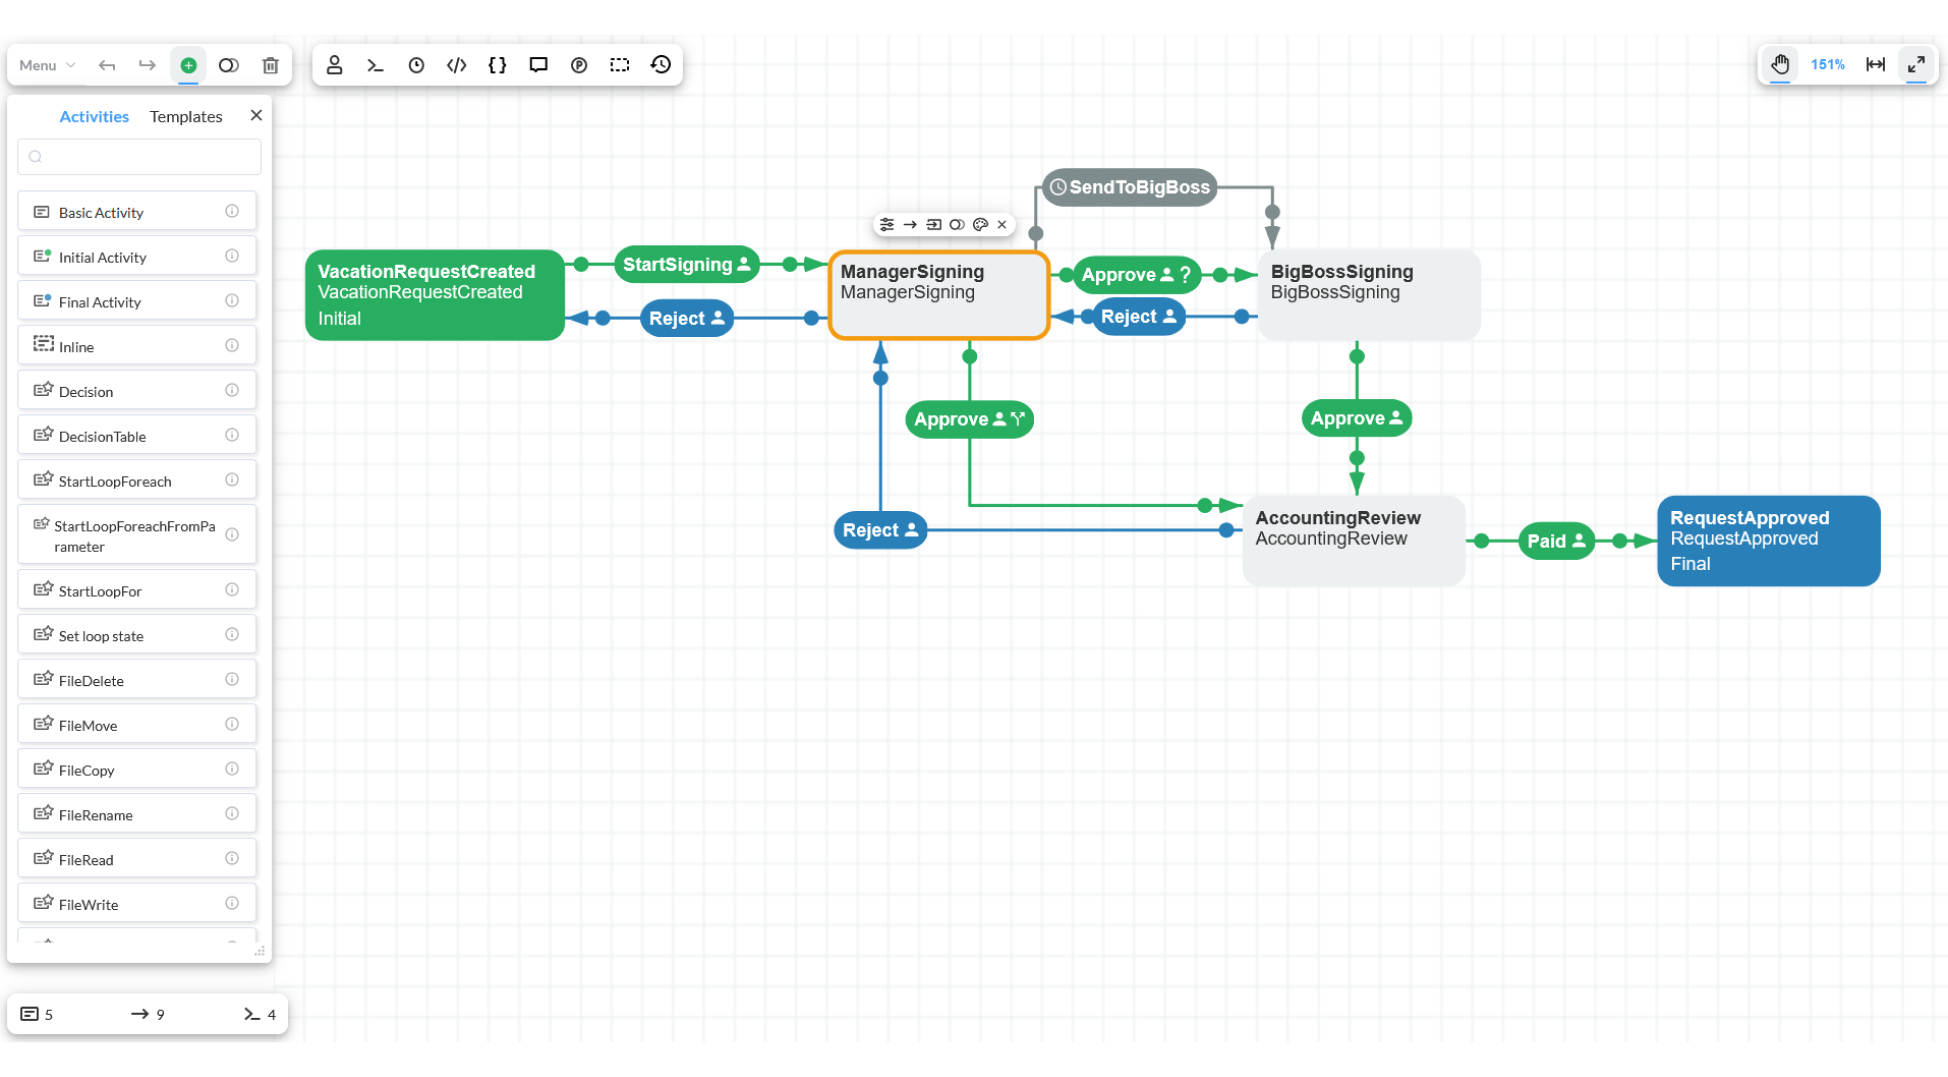
In general, you can edit a process scheme in Designer. The Designer consists of a toolbar and an object graph. It enables you to select objects with a frame and move them with the pressed left mouse button. An object can be selected by clicking on it with the left mouse button. The properties of Activity or Transitions can be accessed by double-clicking on the object.
Activity object represents a rectangle with the following control components:
- Delete button - removes Activity from the scheme;
- Create Next Activity button - creates an Activity and a Transition with default values;
- Create Transition button - creates a Transition which requires to specify the next Activity.
Transition object represents a line with the following control components:
- Touch Point - by moving this component, you may change the initial and final Activity in Transition;
- Active point - double-clicking on this component opens the Transition edit window. You may also change the Transition line position by moving this component with the pressed mouse button.
The rest of the components are contained in the toolbar (from left to right):
- The drop-down list 'Menu'- It provides access to the following functionalities: Upload, Download, Scheme and Languages. Several useful options can be accessed by 'Menu' -> 'Scheme', for instance, Auto arrangement which automatically arranges scheme objects;
- Elements addition button - creates new activities with default values. Besides, there are templates available to use;
- Undo and Redo buttons - revert changes or modifications in the scheme;
- Delete button - removes the selected objects from the scheme;
- Copy selected button - copies the selected objects and pastes them to the scheme;
- Actors button - editing of entity Actors, refer to the Rule-Actor-Restriction section for more details;
- Commands button - editing of Commands, refer to the Commands section for more details;
- Timers button - editing of Timers, refer to the Timers section for more details;
- Code Action button - creates and customize actions, detailed information can be read here.
- Parameters button - editing of entity Parameters, refer to the Parameters section for more details;
- Localization button - editing of Localization constants, refer to the Localization section for more details;
- Process info - provides additional process information;
- Logs button - this parameter is the default value for logging processes based on this scheme;
- Move button - moves the canvas with the object graph against the designer window;
- Zoom in/out button - changes the scale of the displayed objects;
- Set Zoom and Position to Default button - sets the default scale and position of the canvas;
Key objects for interaction
Workflow Engine contains a lots of objects, but to understand this documentation section, you just need to be aware of the following three:
WorkflowRuntime- we mentioned it earlier; it provides API for working with processes;ProcessInstance- process instance; it provides access to the process scheme and parameters;ProcessDefinition- object representation of a process scheme.
The following code demonstrates how the three objects are interrelated:
var processInstance = await WorkflowInit.Runtime.GetProcessInstanceAndFillProcessParametersAsync(processId);
var processDefinition = processInstance.ProcesScheme;