How to configure and run Workflow Server
General information
Workflow Server is a ready-to-use Workflow Engine-based application that you can deploy into your infrastructure. It can be integrated with NodeJS, PHP, Ruby, .NET, or Java applications via an HTTP API. Workflow Server is a key component for managing the lifecycle of business objects within your enterprise.
Initially, download workflowserver.zip from this page and extract it.
How to launch via docker
Run the startcontainer script
For Windows:
startcontainer.batFor Linux/MacOS:
sudo chmod +x docker-files/wait-for-postgres.sh
sudo chmod +x startcontainer.sh
sudo ./startcontainer.sh
This script build this workflowserver's solution and run it with Postgres database.
Open http://localhost:8077 in a browser.
Upload your license key via the Dashboard or save the licence key as 'license.key' into the folder or add to 'license' folder.
Fill in Callback API urls at http://localhost:8077/?apanel=callbackapi to perform integration.
If you would like to run WorkflowServer on MSSQL or MongoDB. You need to use one of docker-compose files:
- MS SQL Server: docker-files/docker-compose-mssql.yml
- MongoDB: docker-files/docker-compose-mongo.yml
MongoDB script:
sudo chmod +x docker-files/wait-for-mongo.sh
sudo docker-compose -f docker-files/docker-compose-mongo.yml build
sudo docker-compose -f docker-files/docker-compose-mongo.yml run --rm start_db
sudo docker-compose -f docker-files/docker-compose-mongo.yml up
MSSQL script:
sudo chmod +x docker-files/wait-for-mssql.sh
sudo docker-compose -f docker-files/docker-compose-mssql.yml build
sudo docker-compose -f docker-files/docker-compose-mssql.yml run --rm start_db
sudo docker-compose -f docker-files/docker-compose-mssql.yml up
How to launch it with a custom database
- Run the following SQL-scripts on a Database (for MS SQL Server from SQL\MSSQL folder, for PostgreSQL from
SQL\PostgreSQL, for Oracle from SQL\Oracle folder, for MySql from SQL\MySql folder):
- CreatePersistenceObjects.sql
- WorkflowServerScripts.sql
- Make the following changes to the config.json file:
- Change the URL parameter to the IP and the port of the HTTP listener. Most likely you'll need to leave it as is.
- Specify "mssql", "postgresql", "oracle", "mysql" or "mongodb" in the "provider" parameter depending on what database provider you are using.
- Change the ConnectionString parameter to match your database provider connection settings.
- Install .NET Core 3.1.
- Run the Workflow Server.
- Workflow Server supports console and service modes on Windows:
- Run the 'start.bat' file to run it in the Console mode
- Run the 'installservice.bat' as administrator to run it in the Service mode
- For Linux/MacOS:
- Open the terminal in a folder where you extracted the 'workflowserver.zip' archive to
- Run the following command: chmod +x start.sh
- Run the following command: './start.sh'
- Workflow Server supports console and service modes on Windows:
- Open http://localhost:8077 in a browser.
- Upload your license key via the Dashboard or save the licence key as 'license.key' into the folder or add to 'license' folder.
- Fill in Callback API urls at http://localhost:8077/?apanel=callbackapi to perform integration.
How to rebuild and run
For Windows:
buildandstart.batFor Linux/MacOS:
sudo chmod +x buildandstart.sh
sudo chmod +x start.sh
sudo ./buildandstart.sh
How to run in Visual Studio
- Open WorkflowServer.sln in Visual Studio or JetBrains Rider.
- Check the connection string to the database in the config.json file, Provider and ConnectionString parameter.
- Run WorkflowServer project.
How to completely customize Workflow Server
- Open WorkflowServer.sln in Visual Studio or JetBrains Rider.
- The solution contains only one project, WorkflowServer; you can add references to your own projects and dlls to it.
- In the WorkflowServer project, find the Program.cs file; you can optionally configure WorkflowRuntime here.
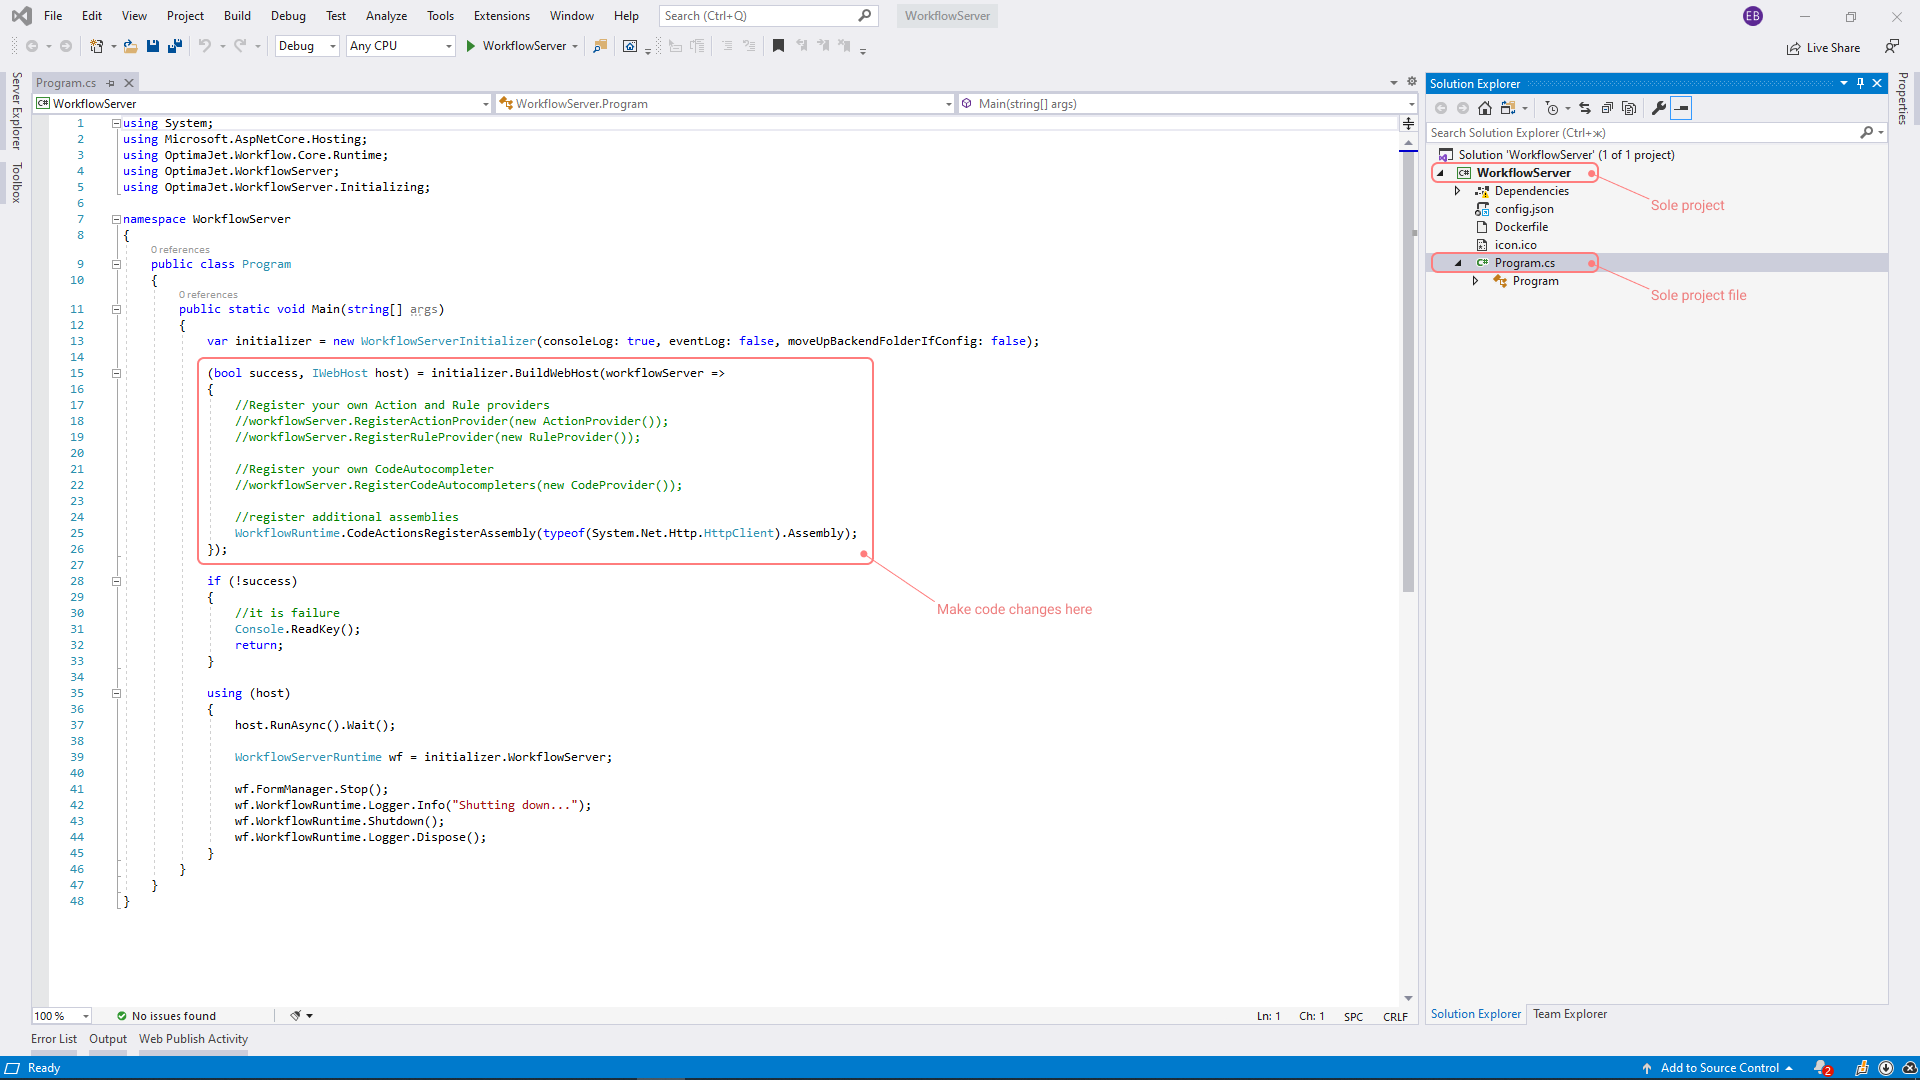
Program.cs contains the following code:
(bool success, IWebHost host) = initializer.BuildWebHost(workflowServer =>
{
    // Register your own Action and Rule providers
    //workflowServer.RegisterActionProvider(new ActionProvider());
    //workflowServer.RegisterRuleProvider(new RuleProvider());

    // Register your own CodeAutocompleter
    //workflowServer.RegisterCodeAutocompleters(new CodeProvider());

    // register additional assemblies
    WorkflowRuntime.CodeActionsRegisterAssembly(typeof(System.Net.Http.HttpClient).Assembly);
});
The object workflowServer.WorkflowRuntime is available here; thus, you can add your own versions of:
- IWorkflowActionProvider
- IWorkflowRuleProvider
- IDesignerAutocompleteProvider
- IDesignerParameterFormatProvider
- add plug-ins of your own;
- subscribe to any
WorkflowRuntimeevents, such as events that occur during the process execution or an error handling; - add customized Process Restorers;
Therefore, you get access for complete customization of Workflow Engine in Workflow Server.